Saying Farewell to our First Home.

Today is the day we officially close a foundational chapter in our lives as “Christian & Melissa”.

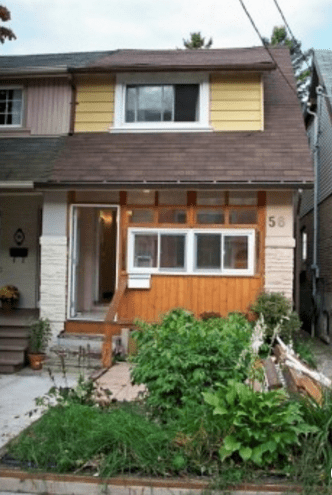
Christian and I purchased our first home in summer of 2009.  We were 3 months engaged, eager home-buyers looking for that “potential-unlocking” fixer-upper.  The up-and-coming neighbourhood of Leslieville still had the grit of the city, but was showing signs of a changing landscape.  New restaurants were popping up, families were moving in, and the residents had successfully fended off the terror that is Wal-Mart just one year prior. Movement was afoot.

We put in our bid just before the August long weekend and went to the nearby McDonald’s to assess what we had just done.  I distinctly remember the acute need to throw up.  Not from the smell of the aforementioned McDonald’s, but from the sheer panic about the decision we had just made.   In just a few moments, we made the decision to incur the biggest debt we had ever seen, all hanging on the small nest egg that my uber-responsible husband had scrounged and saved into RRSP’s during the previous few years.  Me?  I had nothing but additional student loans to throw into the mix.  We were betting it all on a desperately sad-looking fixer-upper.

But boy, did we have gumption.  That, and a strong sense of purpose: we were going to turn that tiny sum of money into a home, and a life together.  Throw in some major DIY skills from Christian and my early exposure to all things design (as a child, we didn’t go to the zoo….we went to Living Lighting and the Kitchen Cabinet store.  Not kidding.  I could tell you what wainscotting was by age 8) and we could NOT be stopped.

It was, by most respects, the ugliest house on the street.  But it was OURS.  We were going to turn it into our future.

Screen Shot 2016-08-31 at 8.52.04 PM

I will never forget the day we got the keys. We drove to our new home and opened the door.  The smell of mould, must and rotten fish was still strong…but it didn’t matter.  We were home. We wandered down Queen Street East, bought some fish n’ chips served in styrofoam as our celebratory meal, and popped the mini bottle of bubbly that I had bought just for the occasion.

Screen Shot 2016-08-31 at 8.51.17 PM

At 7am the next morning, we would begin.

Screen Shot 2016-08-31 at 8.41.18 PM

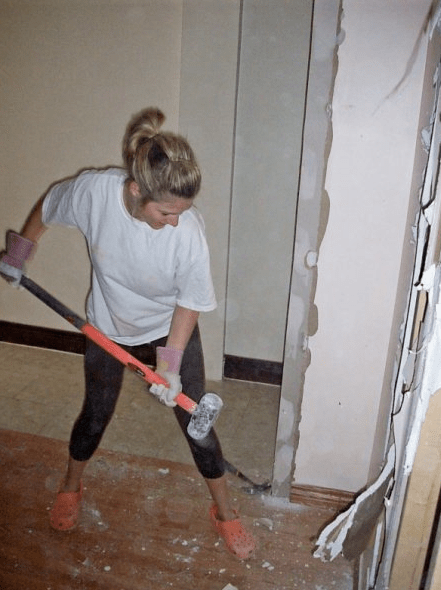
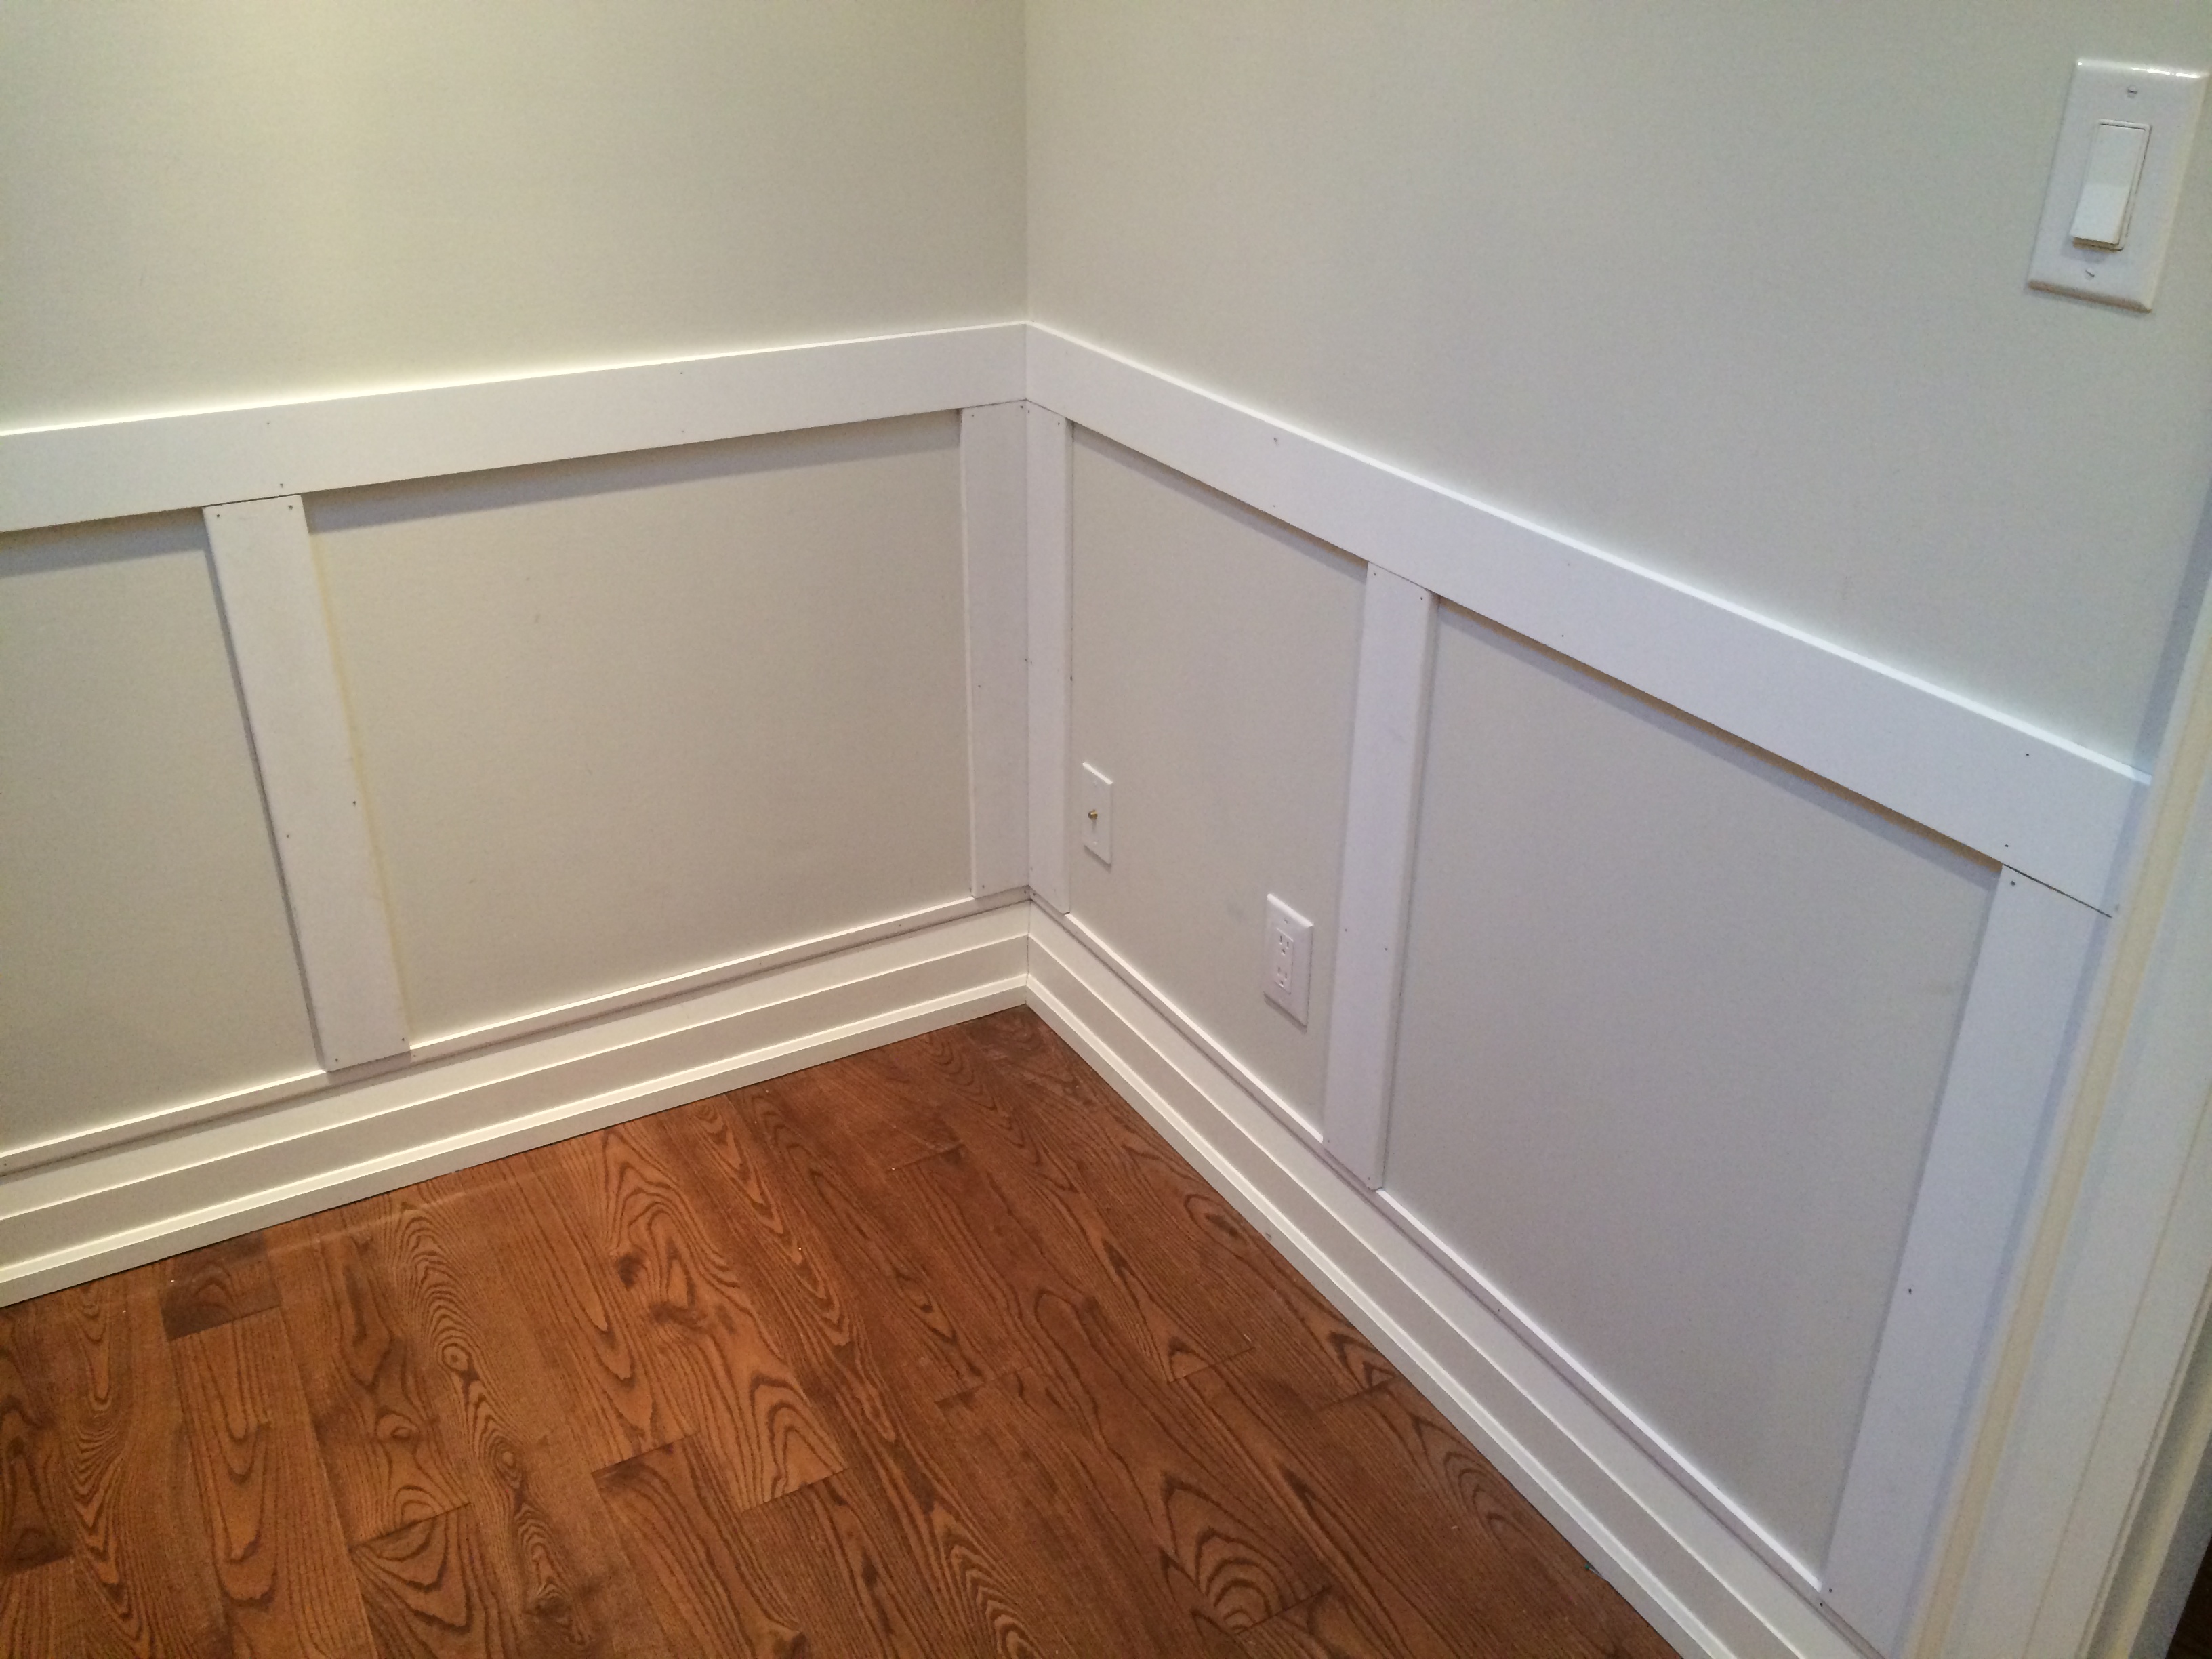
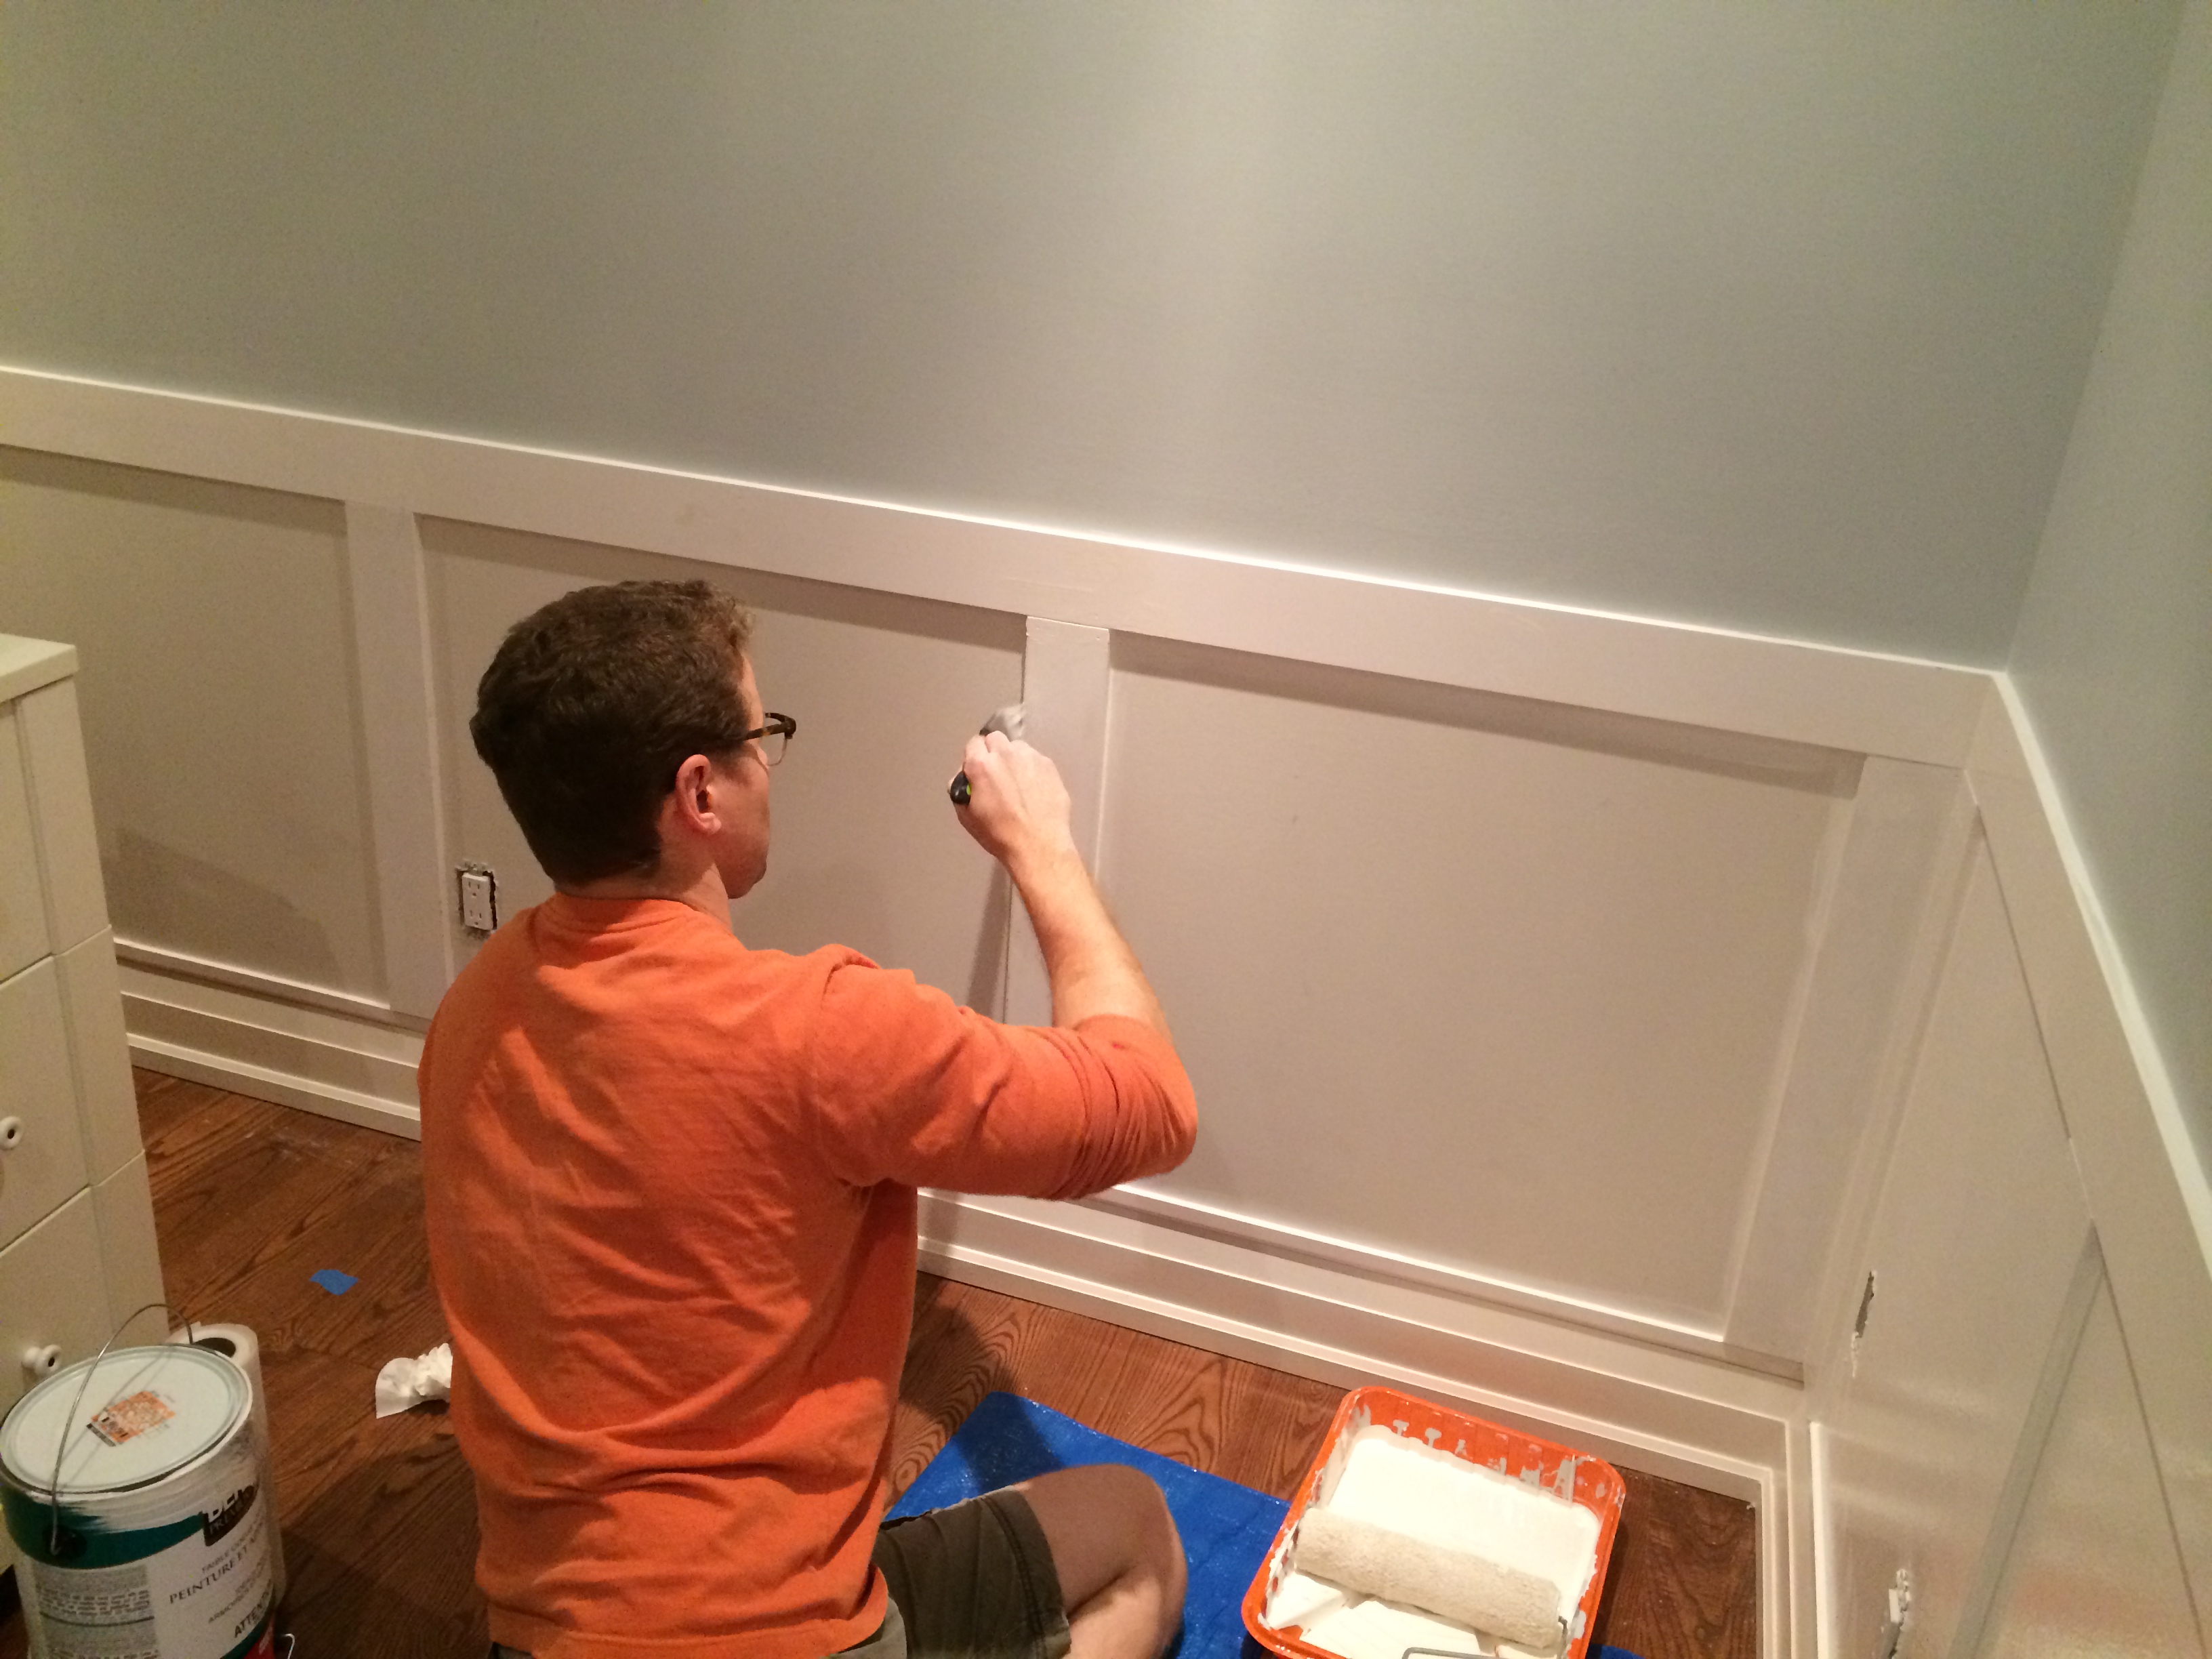
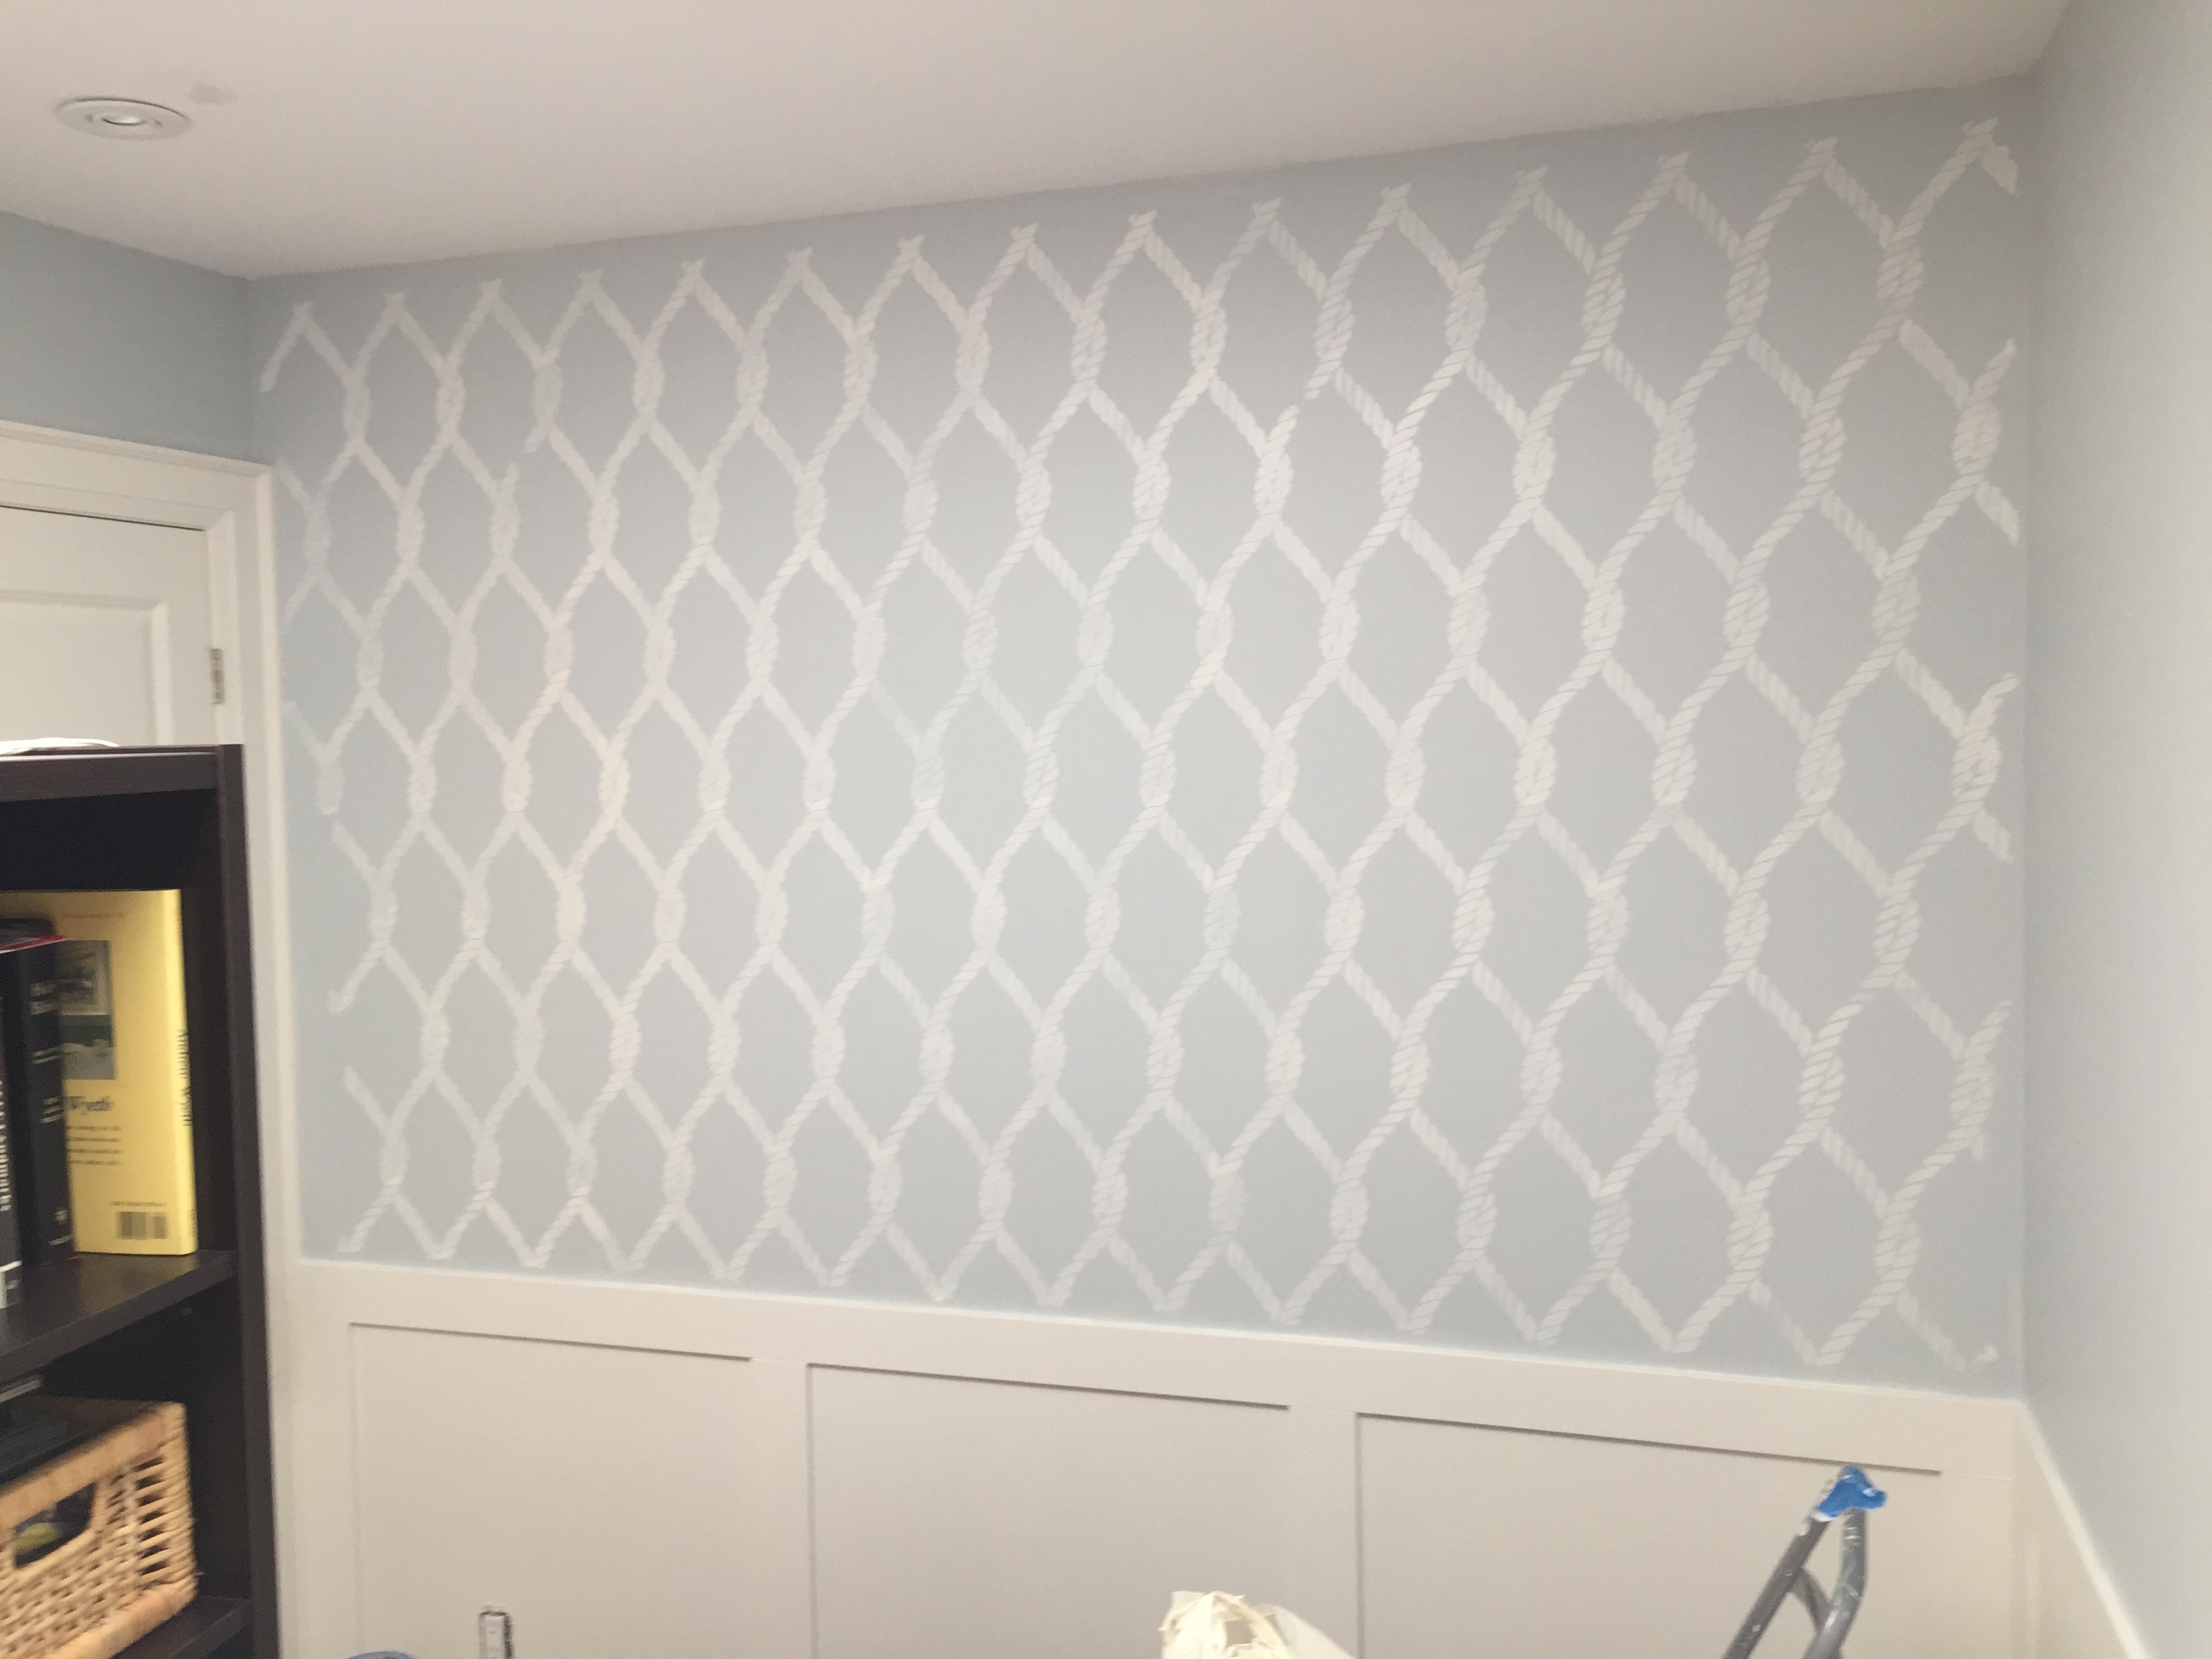
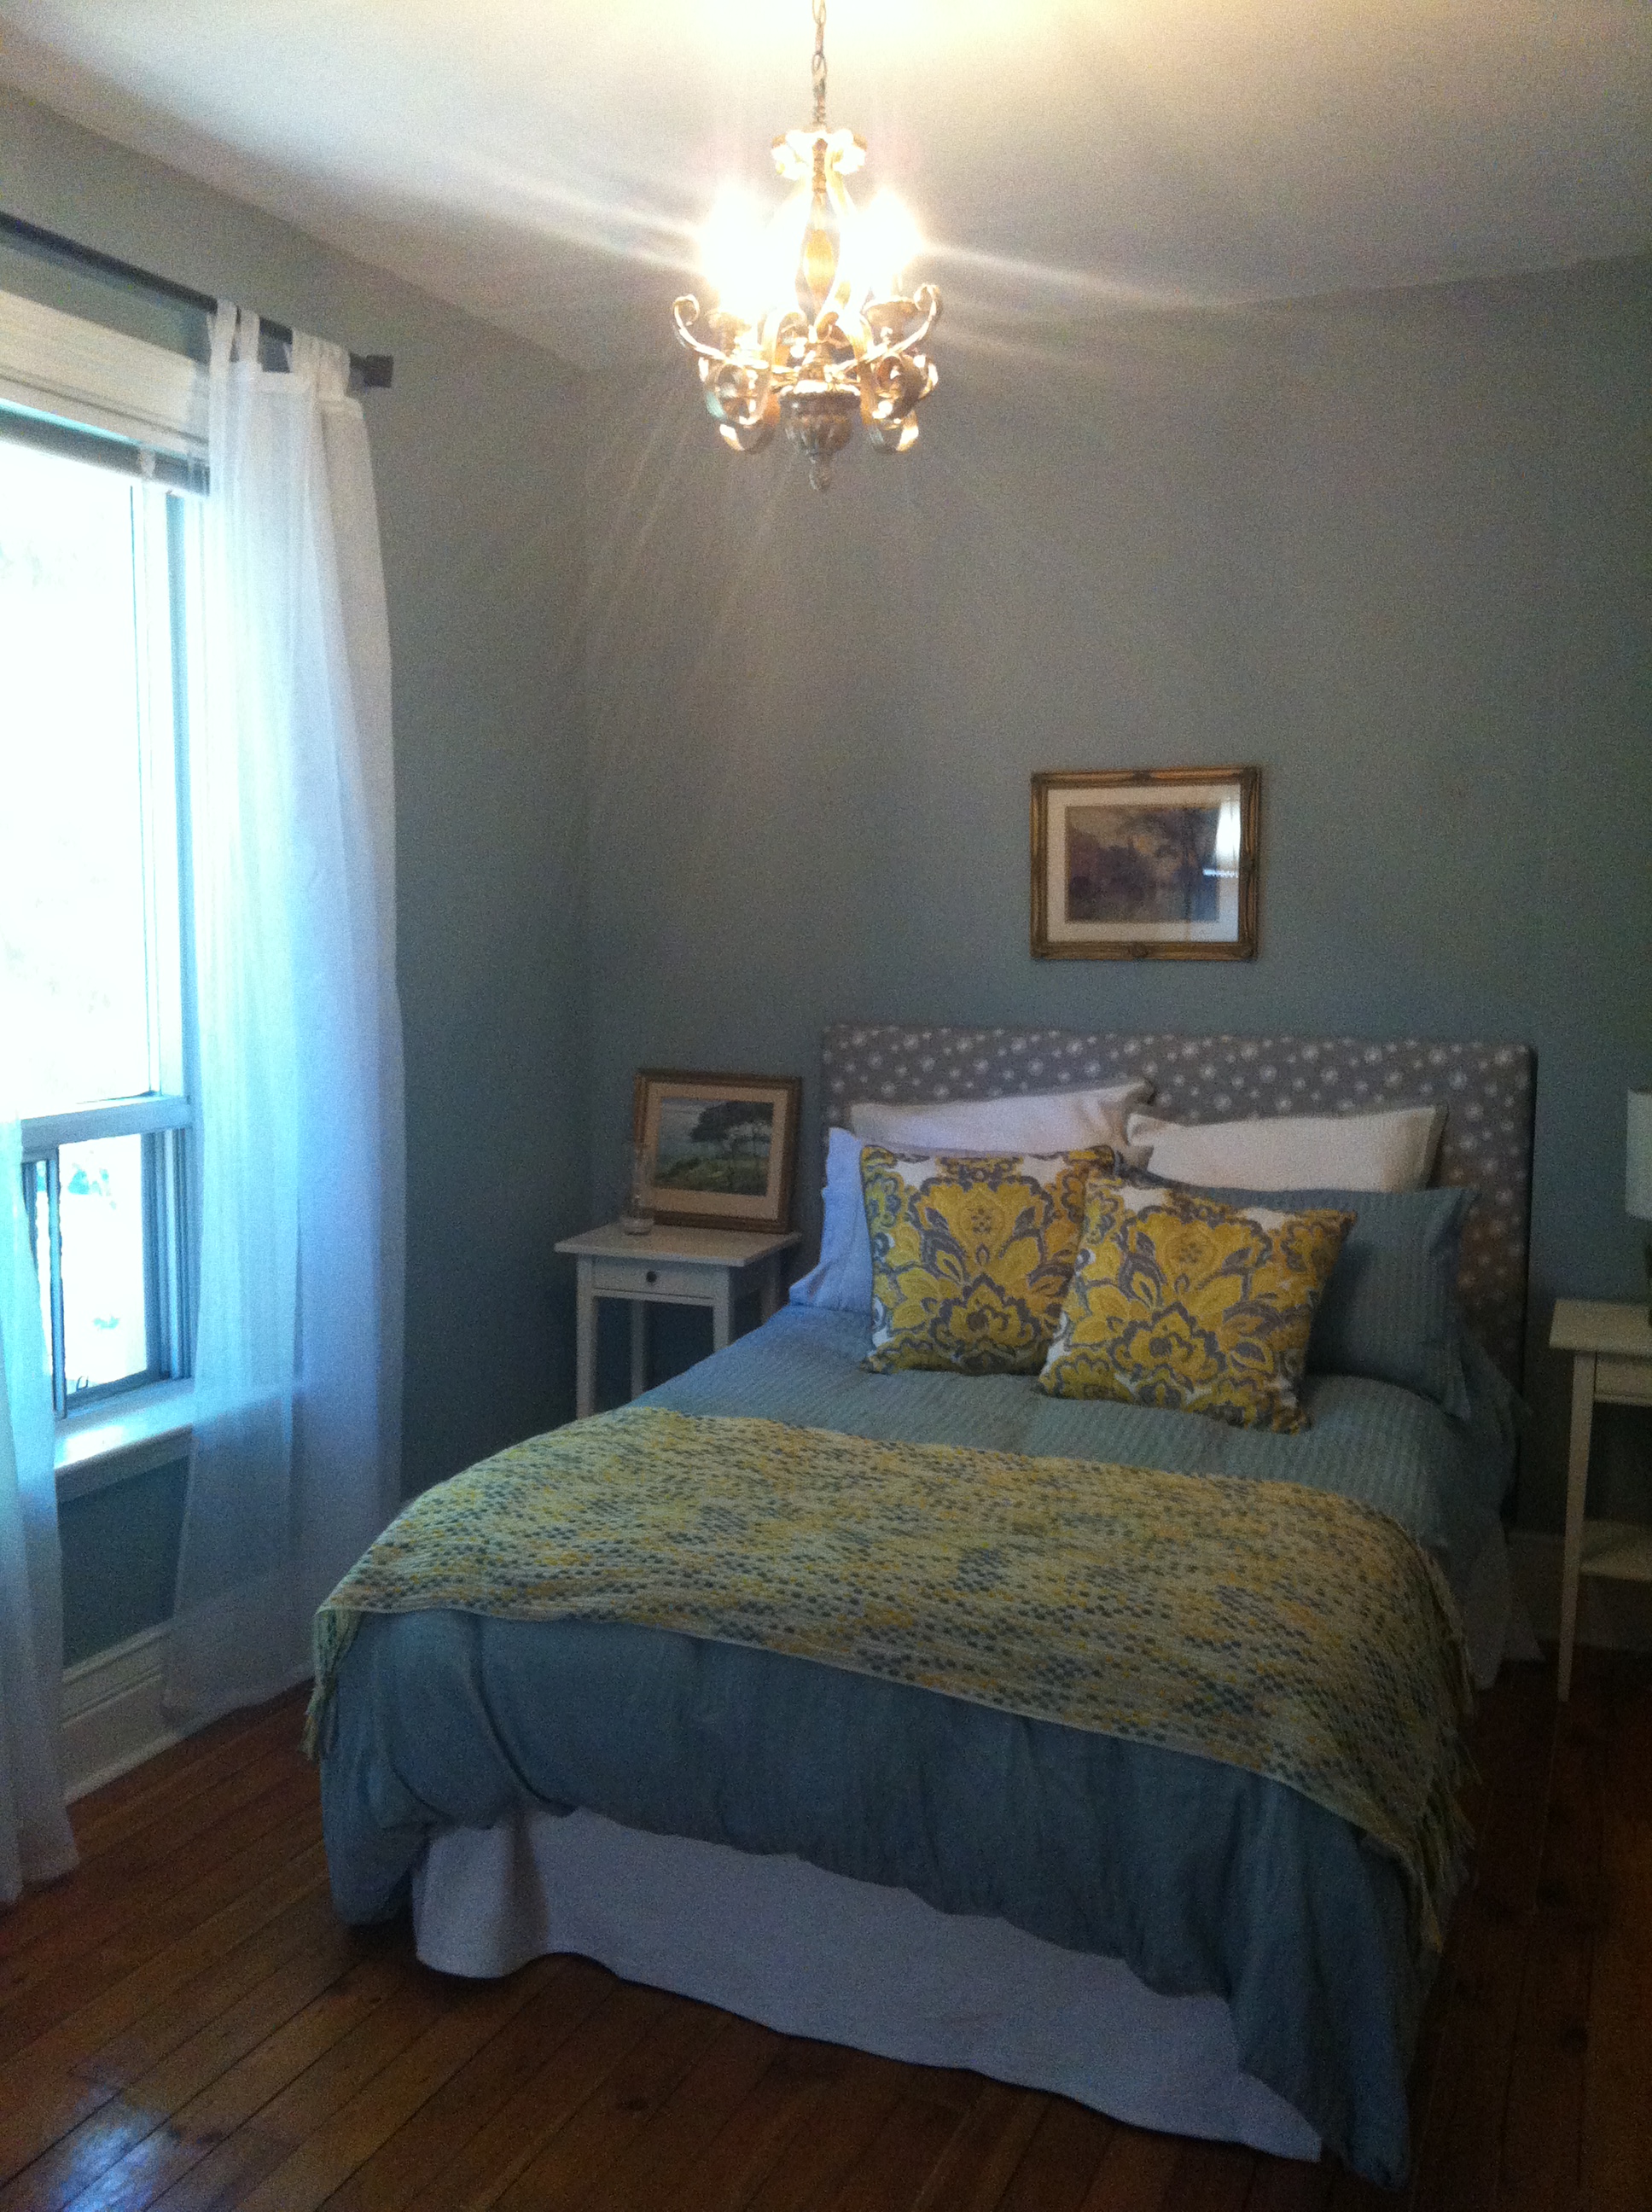
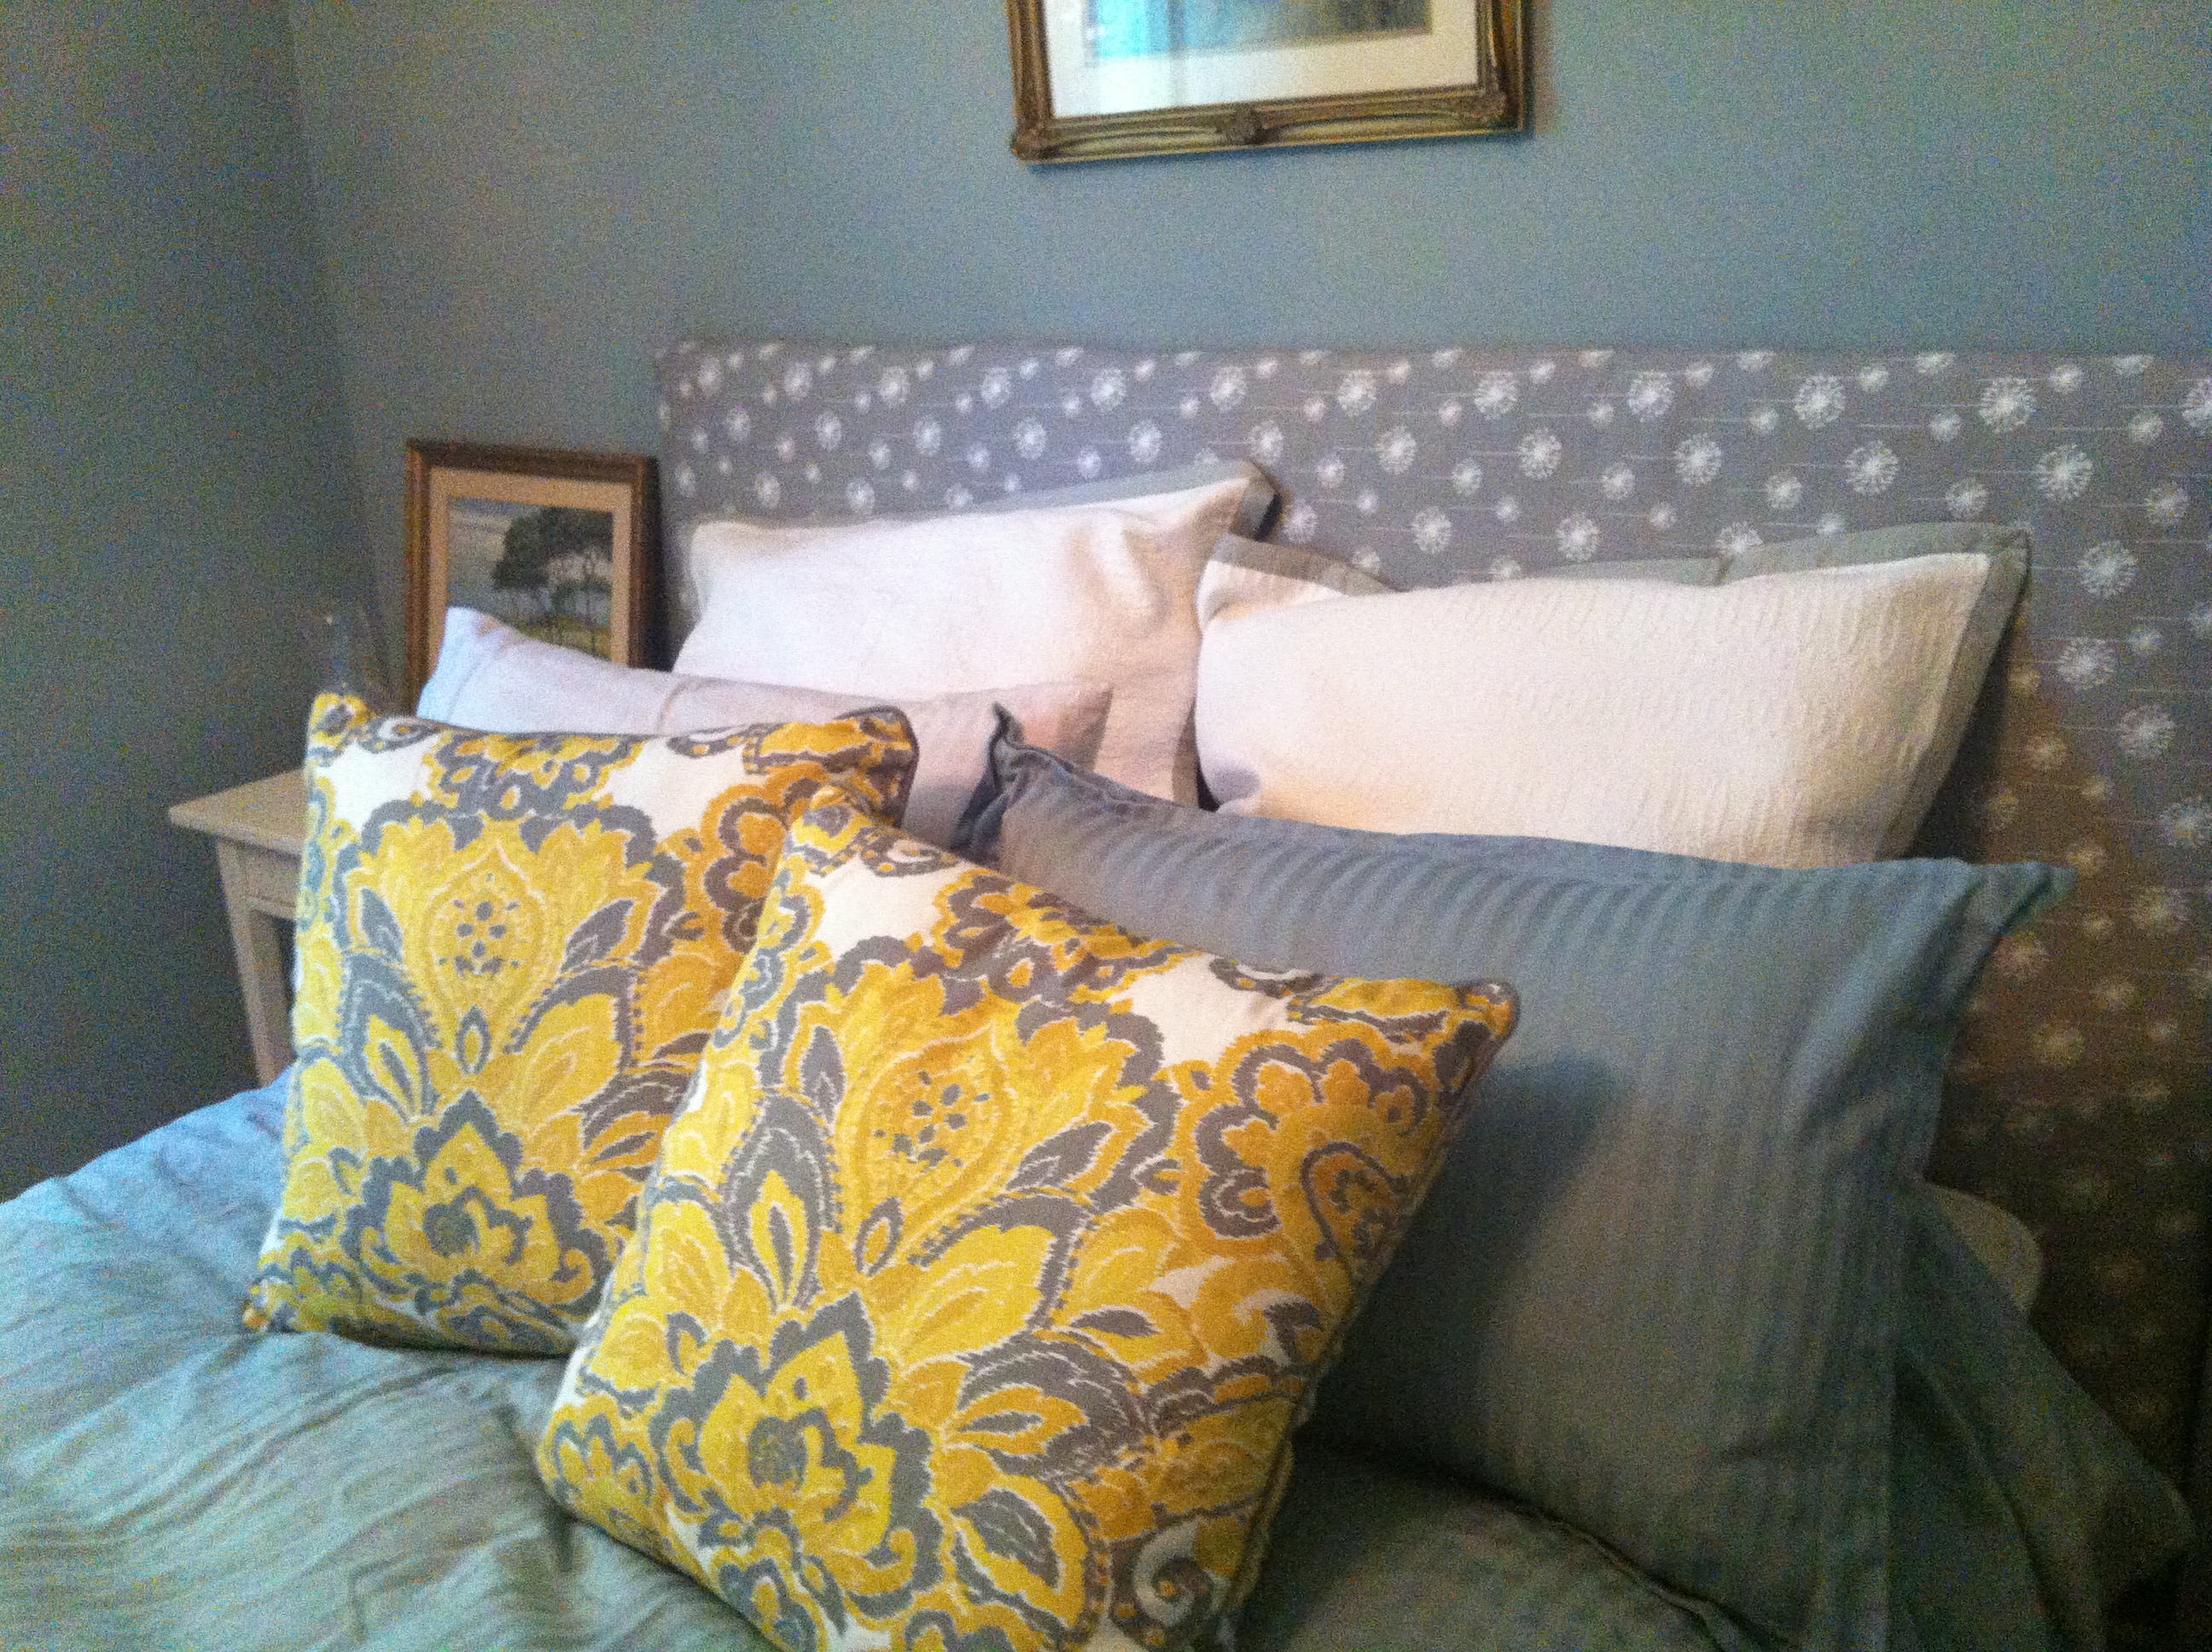
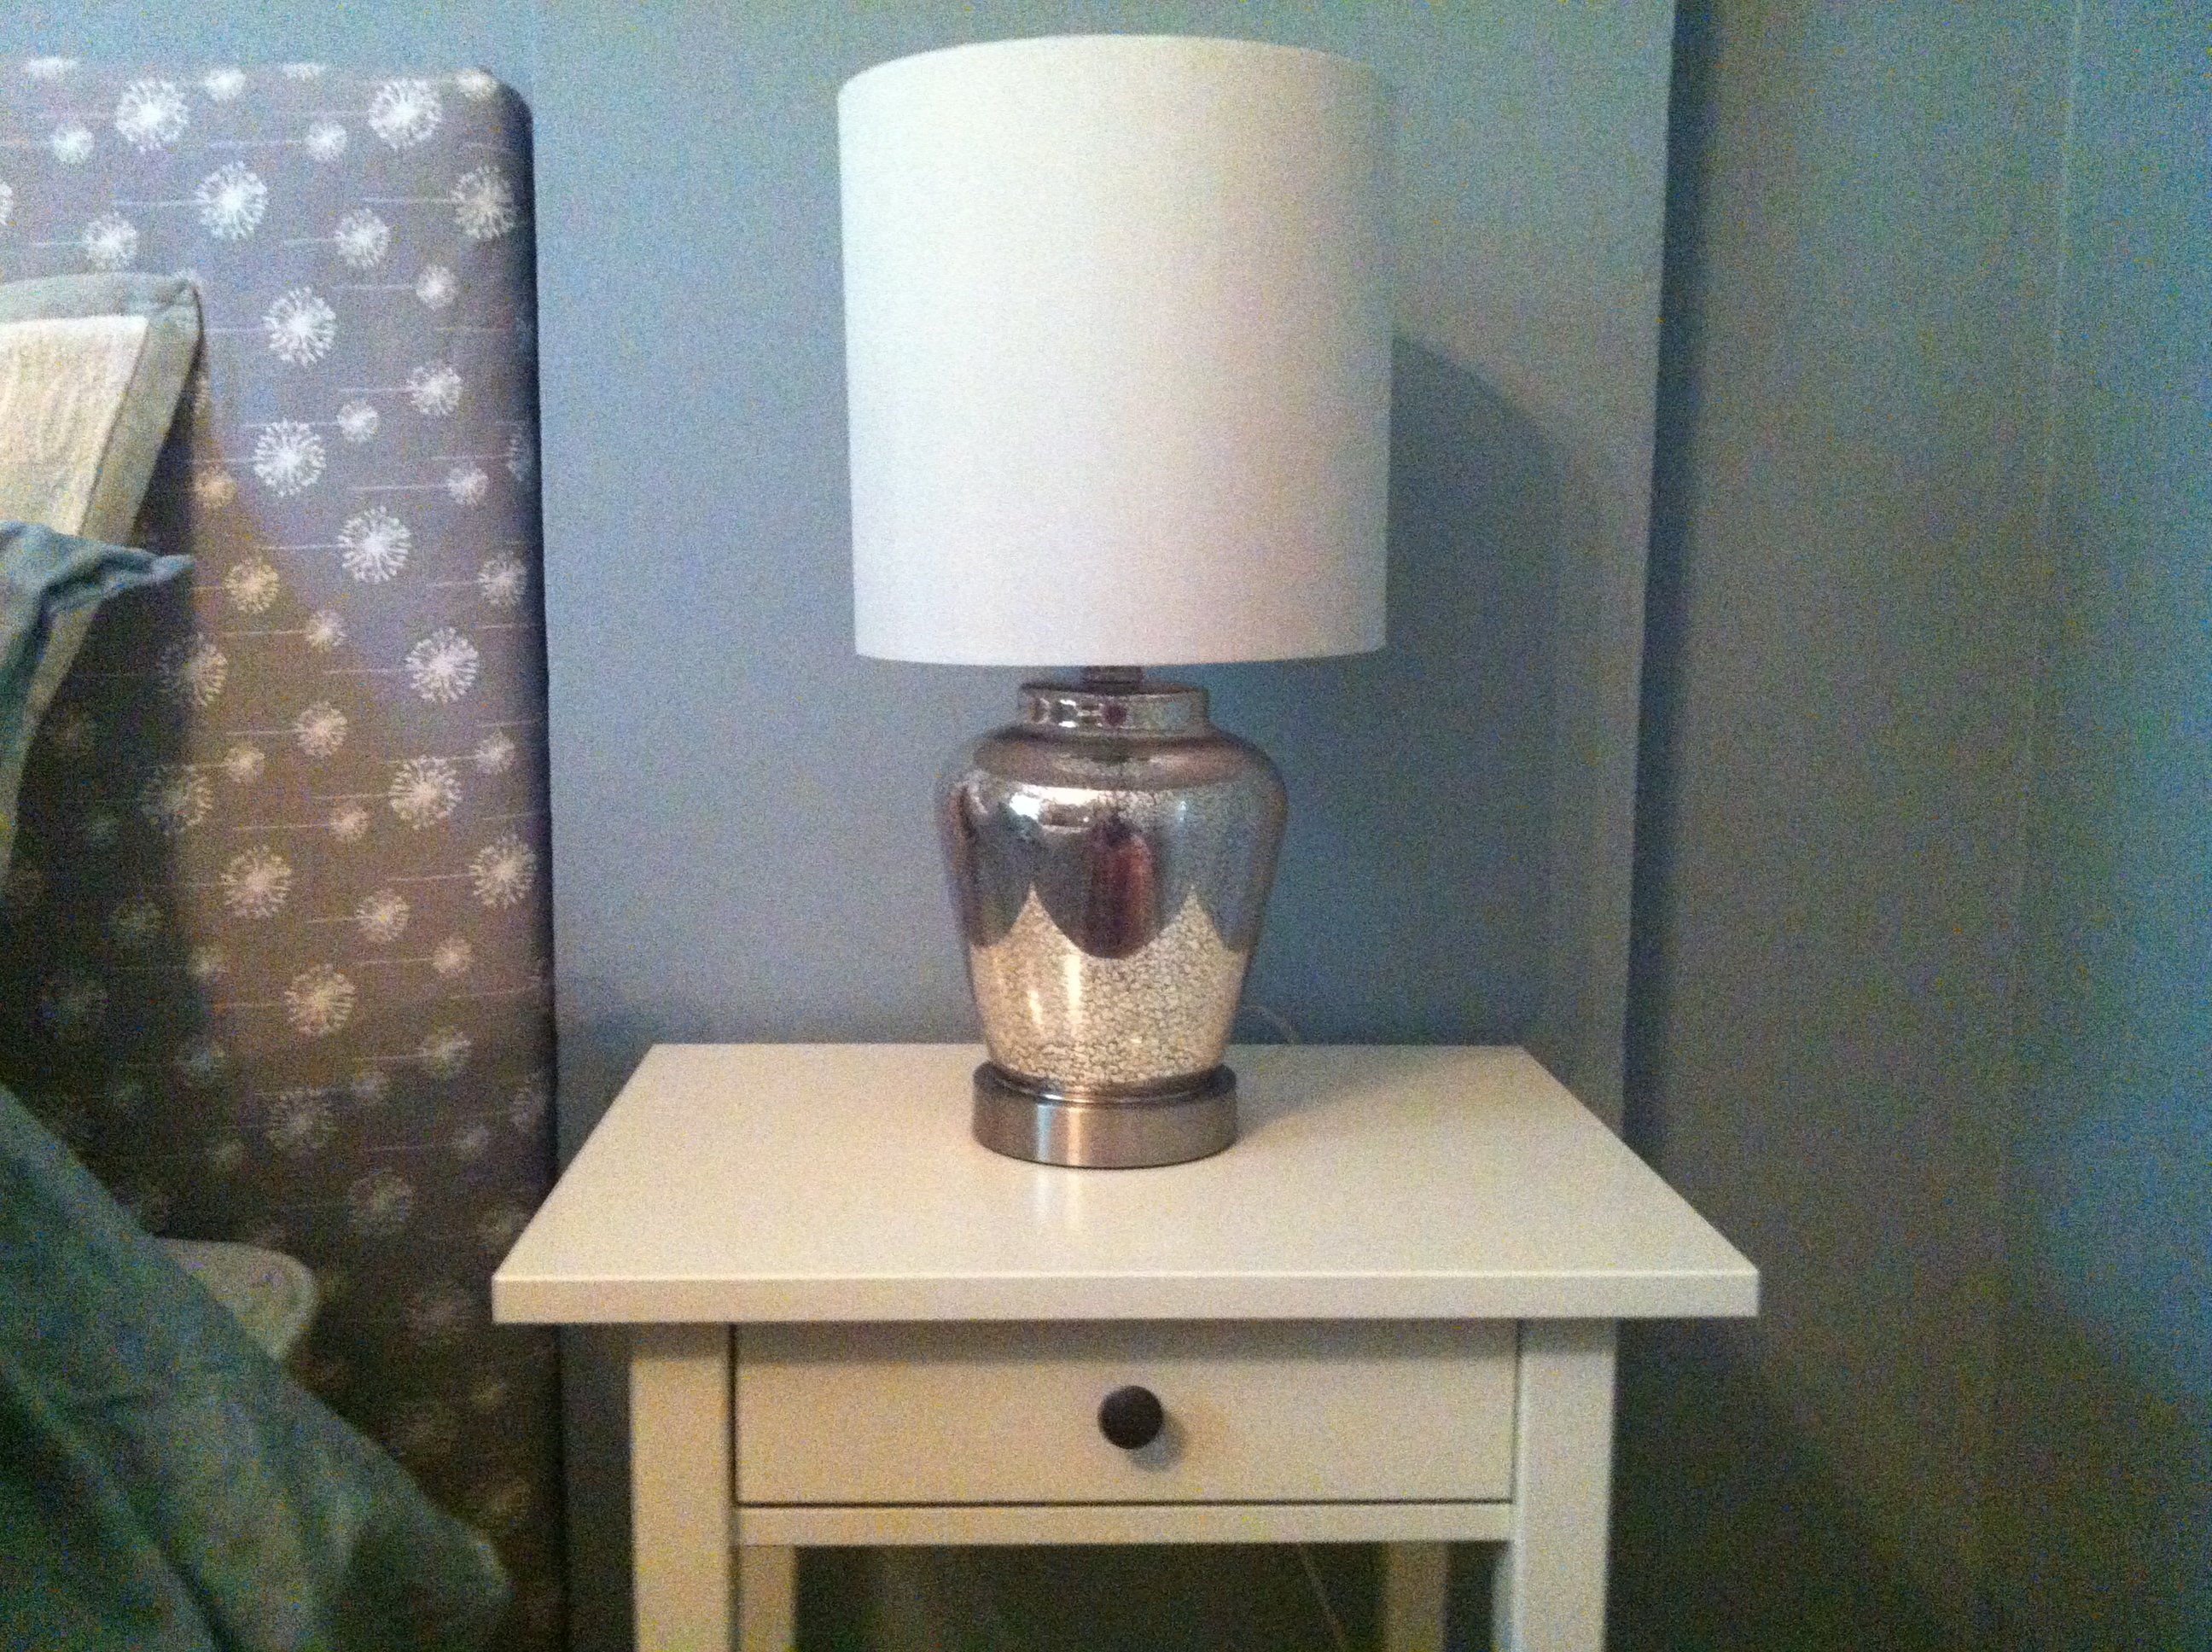
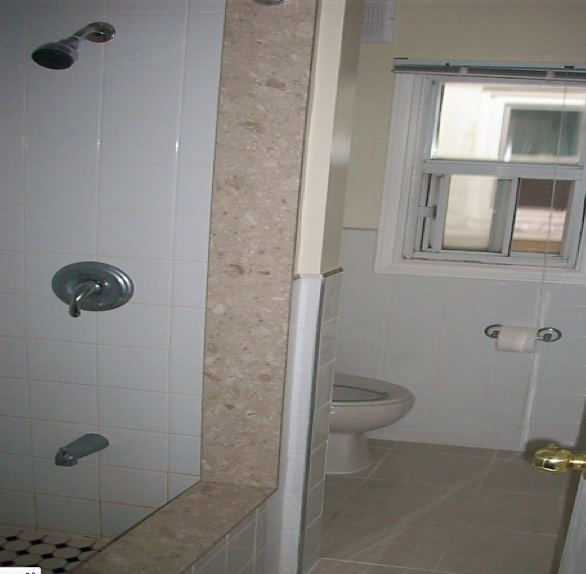
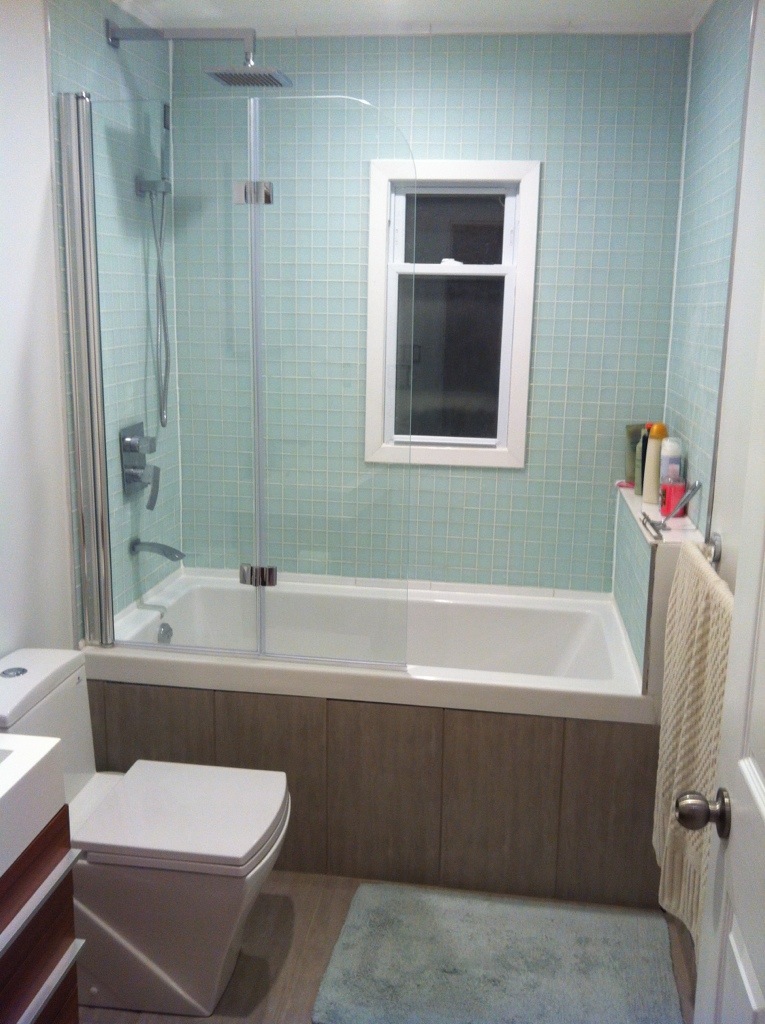
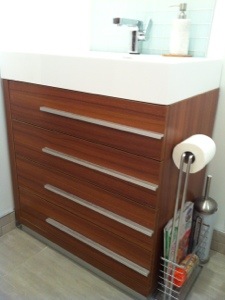
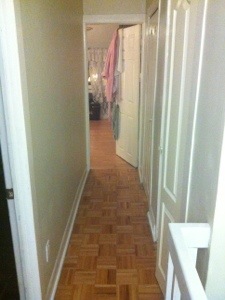
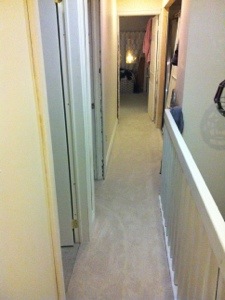
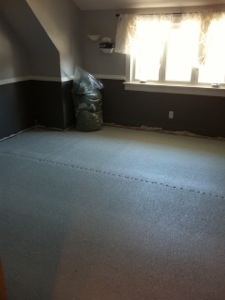
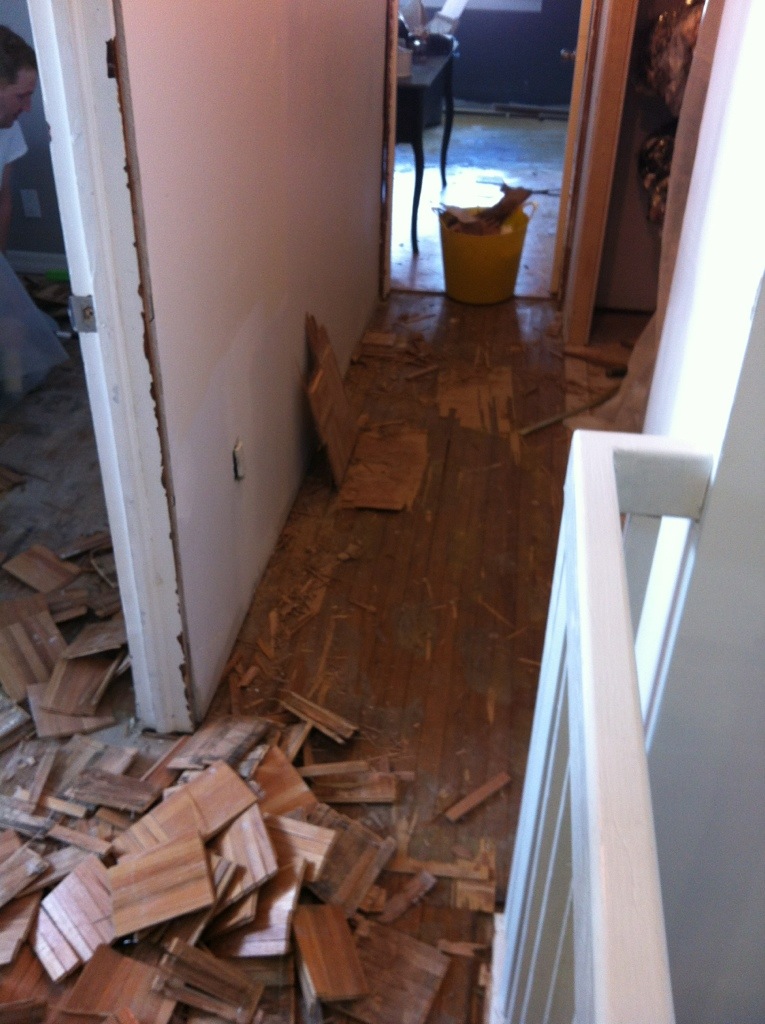
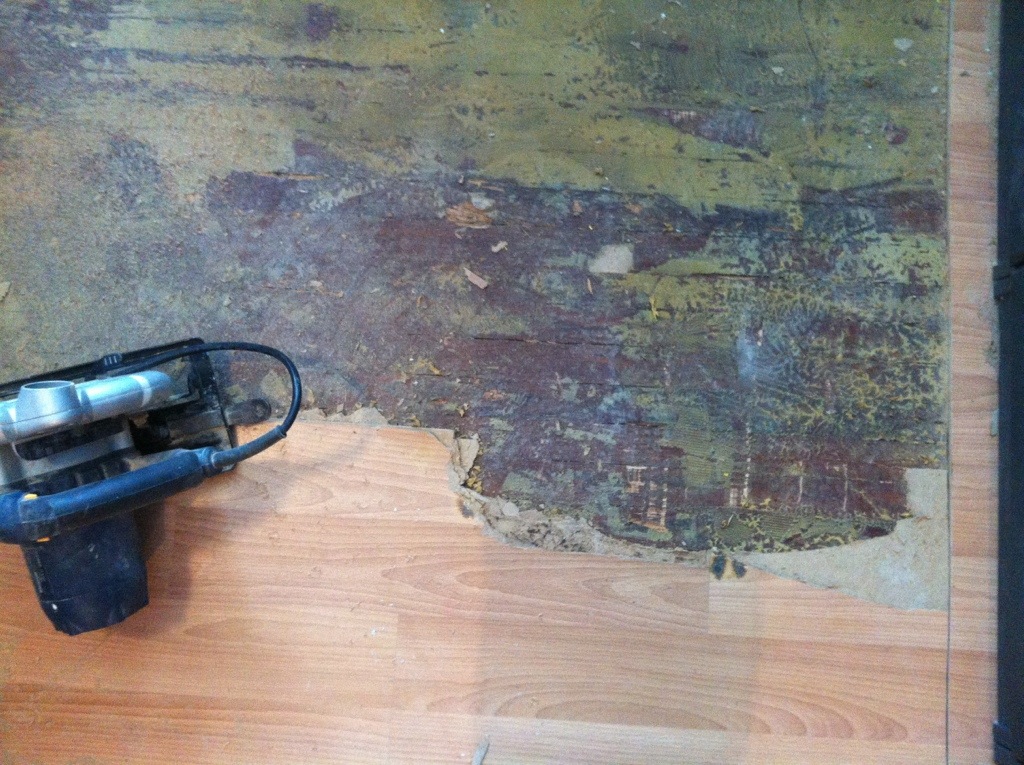
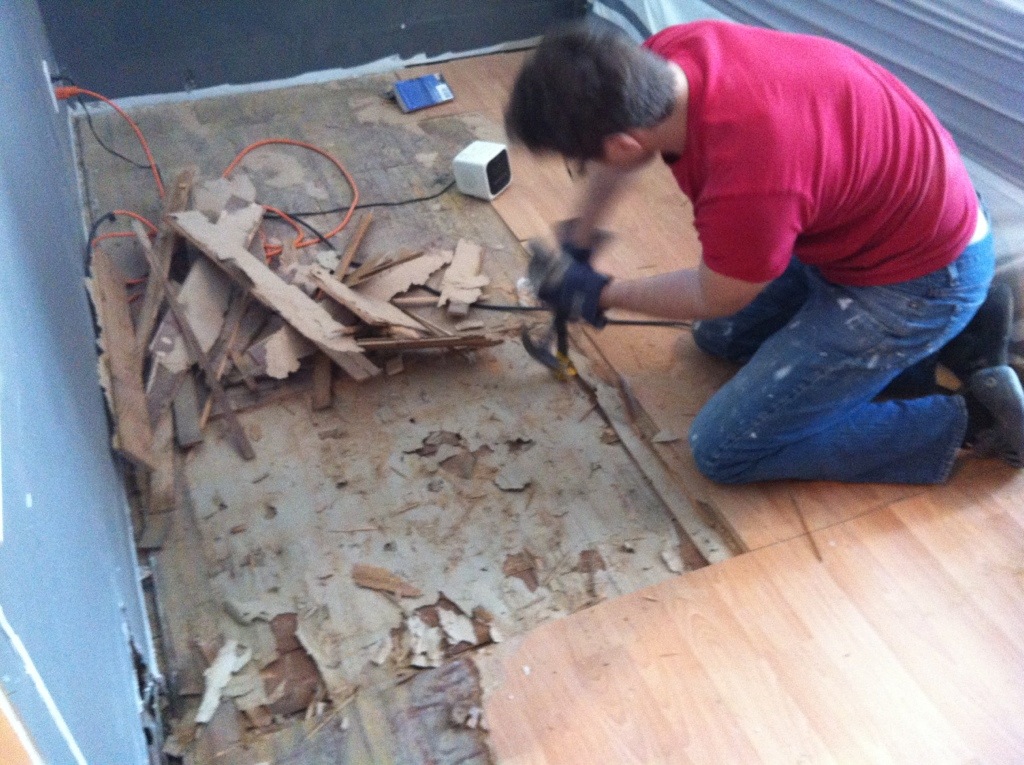
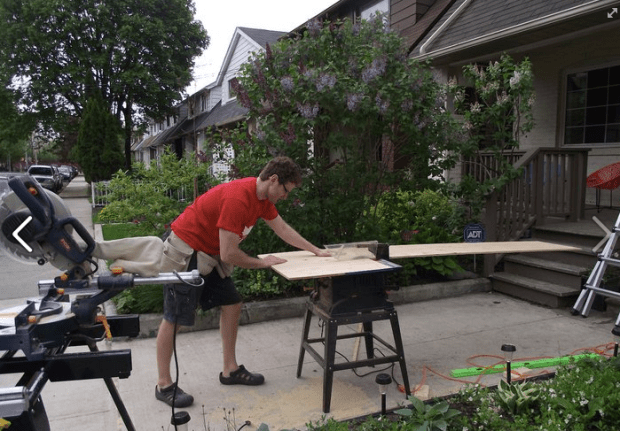
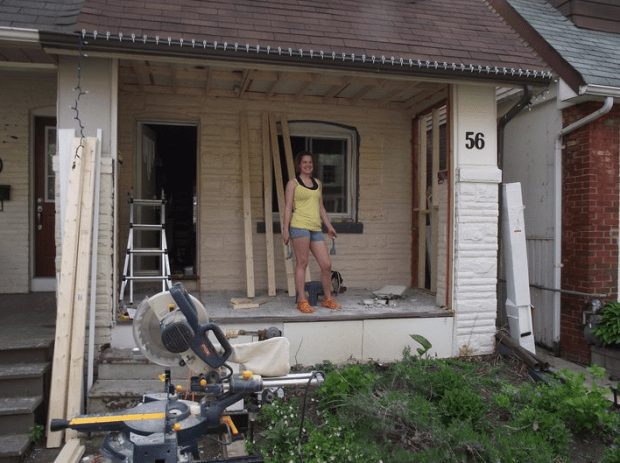
And so unfolded four years of nearly never-ending renovations.  Weekend after weekend after weekend of work.  14 hour days. Aching backs.  Bloody knuckles.  Loss of sleep. Living in dust and dirt.  Saying no to most social events because we had to “work on the house”.  Avoiding trips and costly outings because that money could go to a sink or a fixture or some other coveted item at Home Depot. Always the house.  Room by room and space by space, we slowly made it our own. Together.  I’ve often said that renovating a house with your spouse is like marriage counselling 101.  The joy, the tears; pushing you to the brink and then just a little but further.  Yelling.  Fighting.  Laughing.  Crying.

“It’s your fault we got into this in the first place!!” I would exclaim to my tireless worker of a husband.

Screen Shot 2016-08-31 at 8.40.02 PM

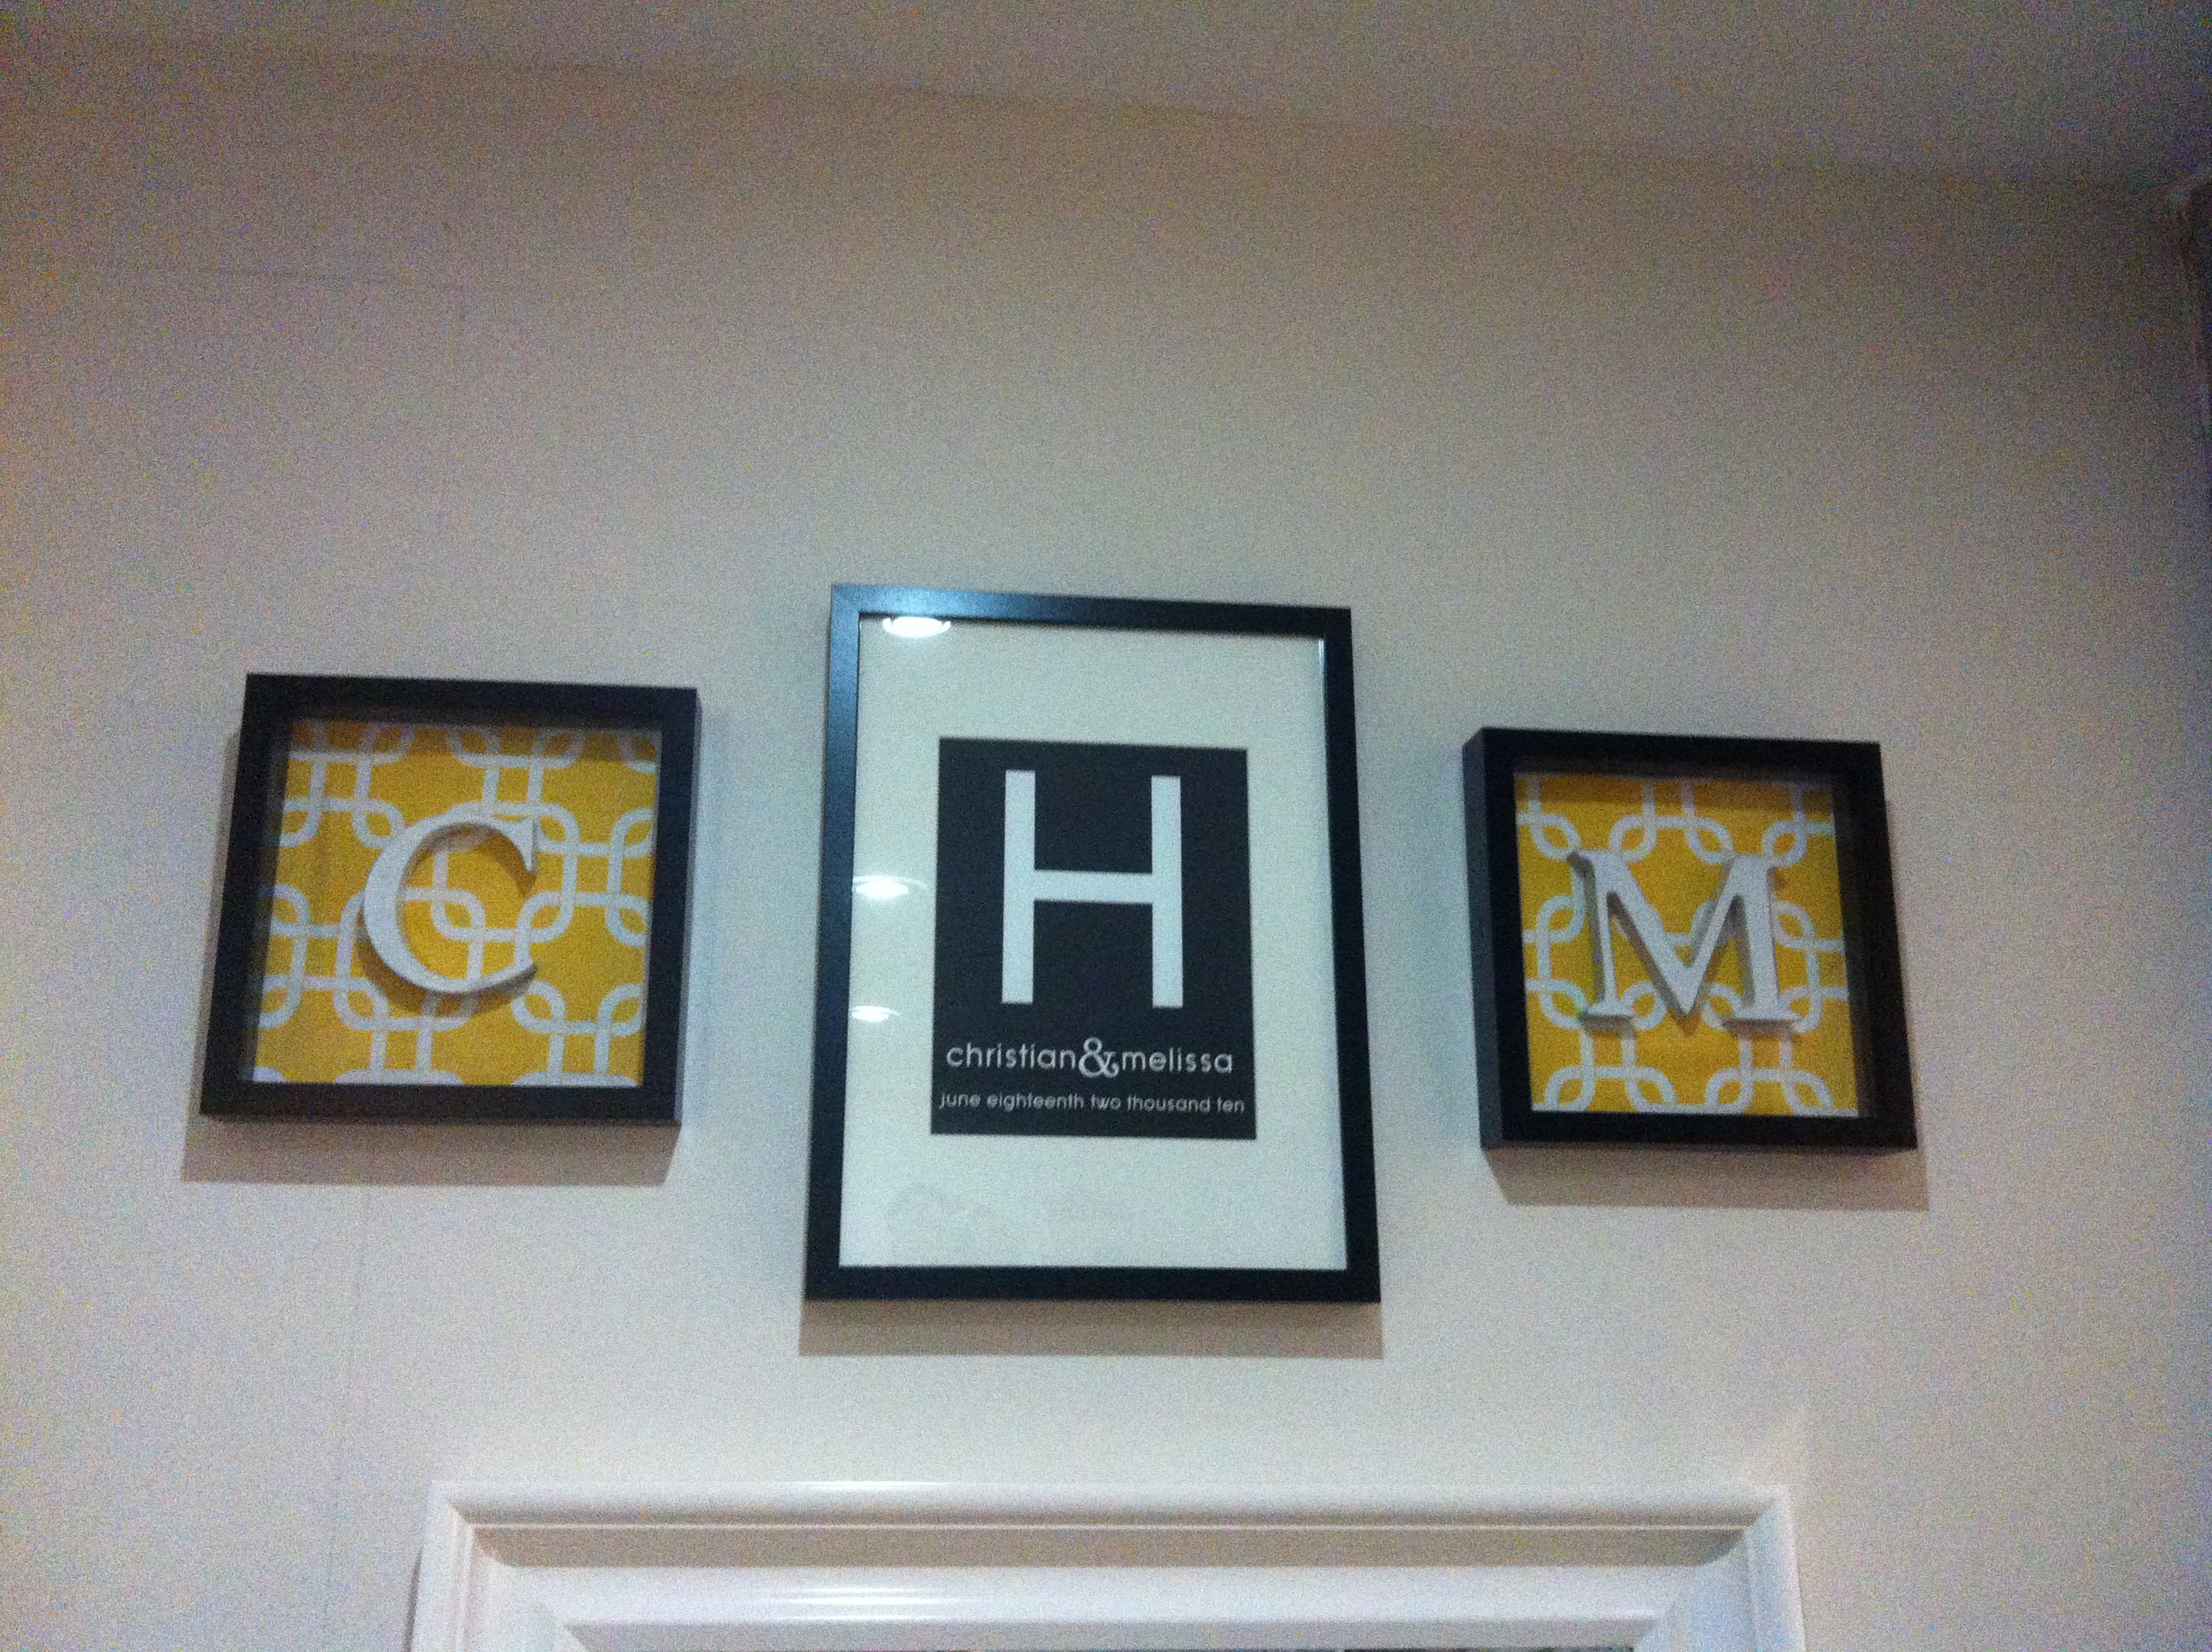
And here I am, 7 years later, writing an ode to that place.

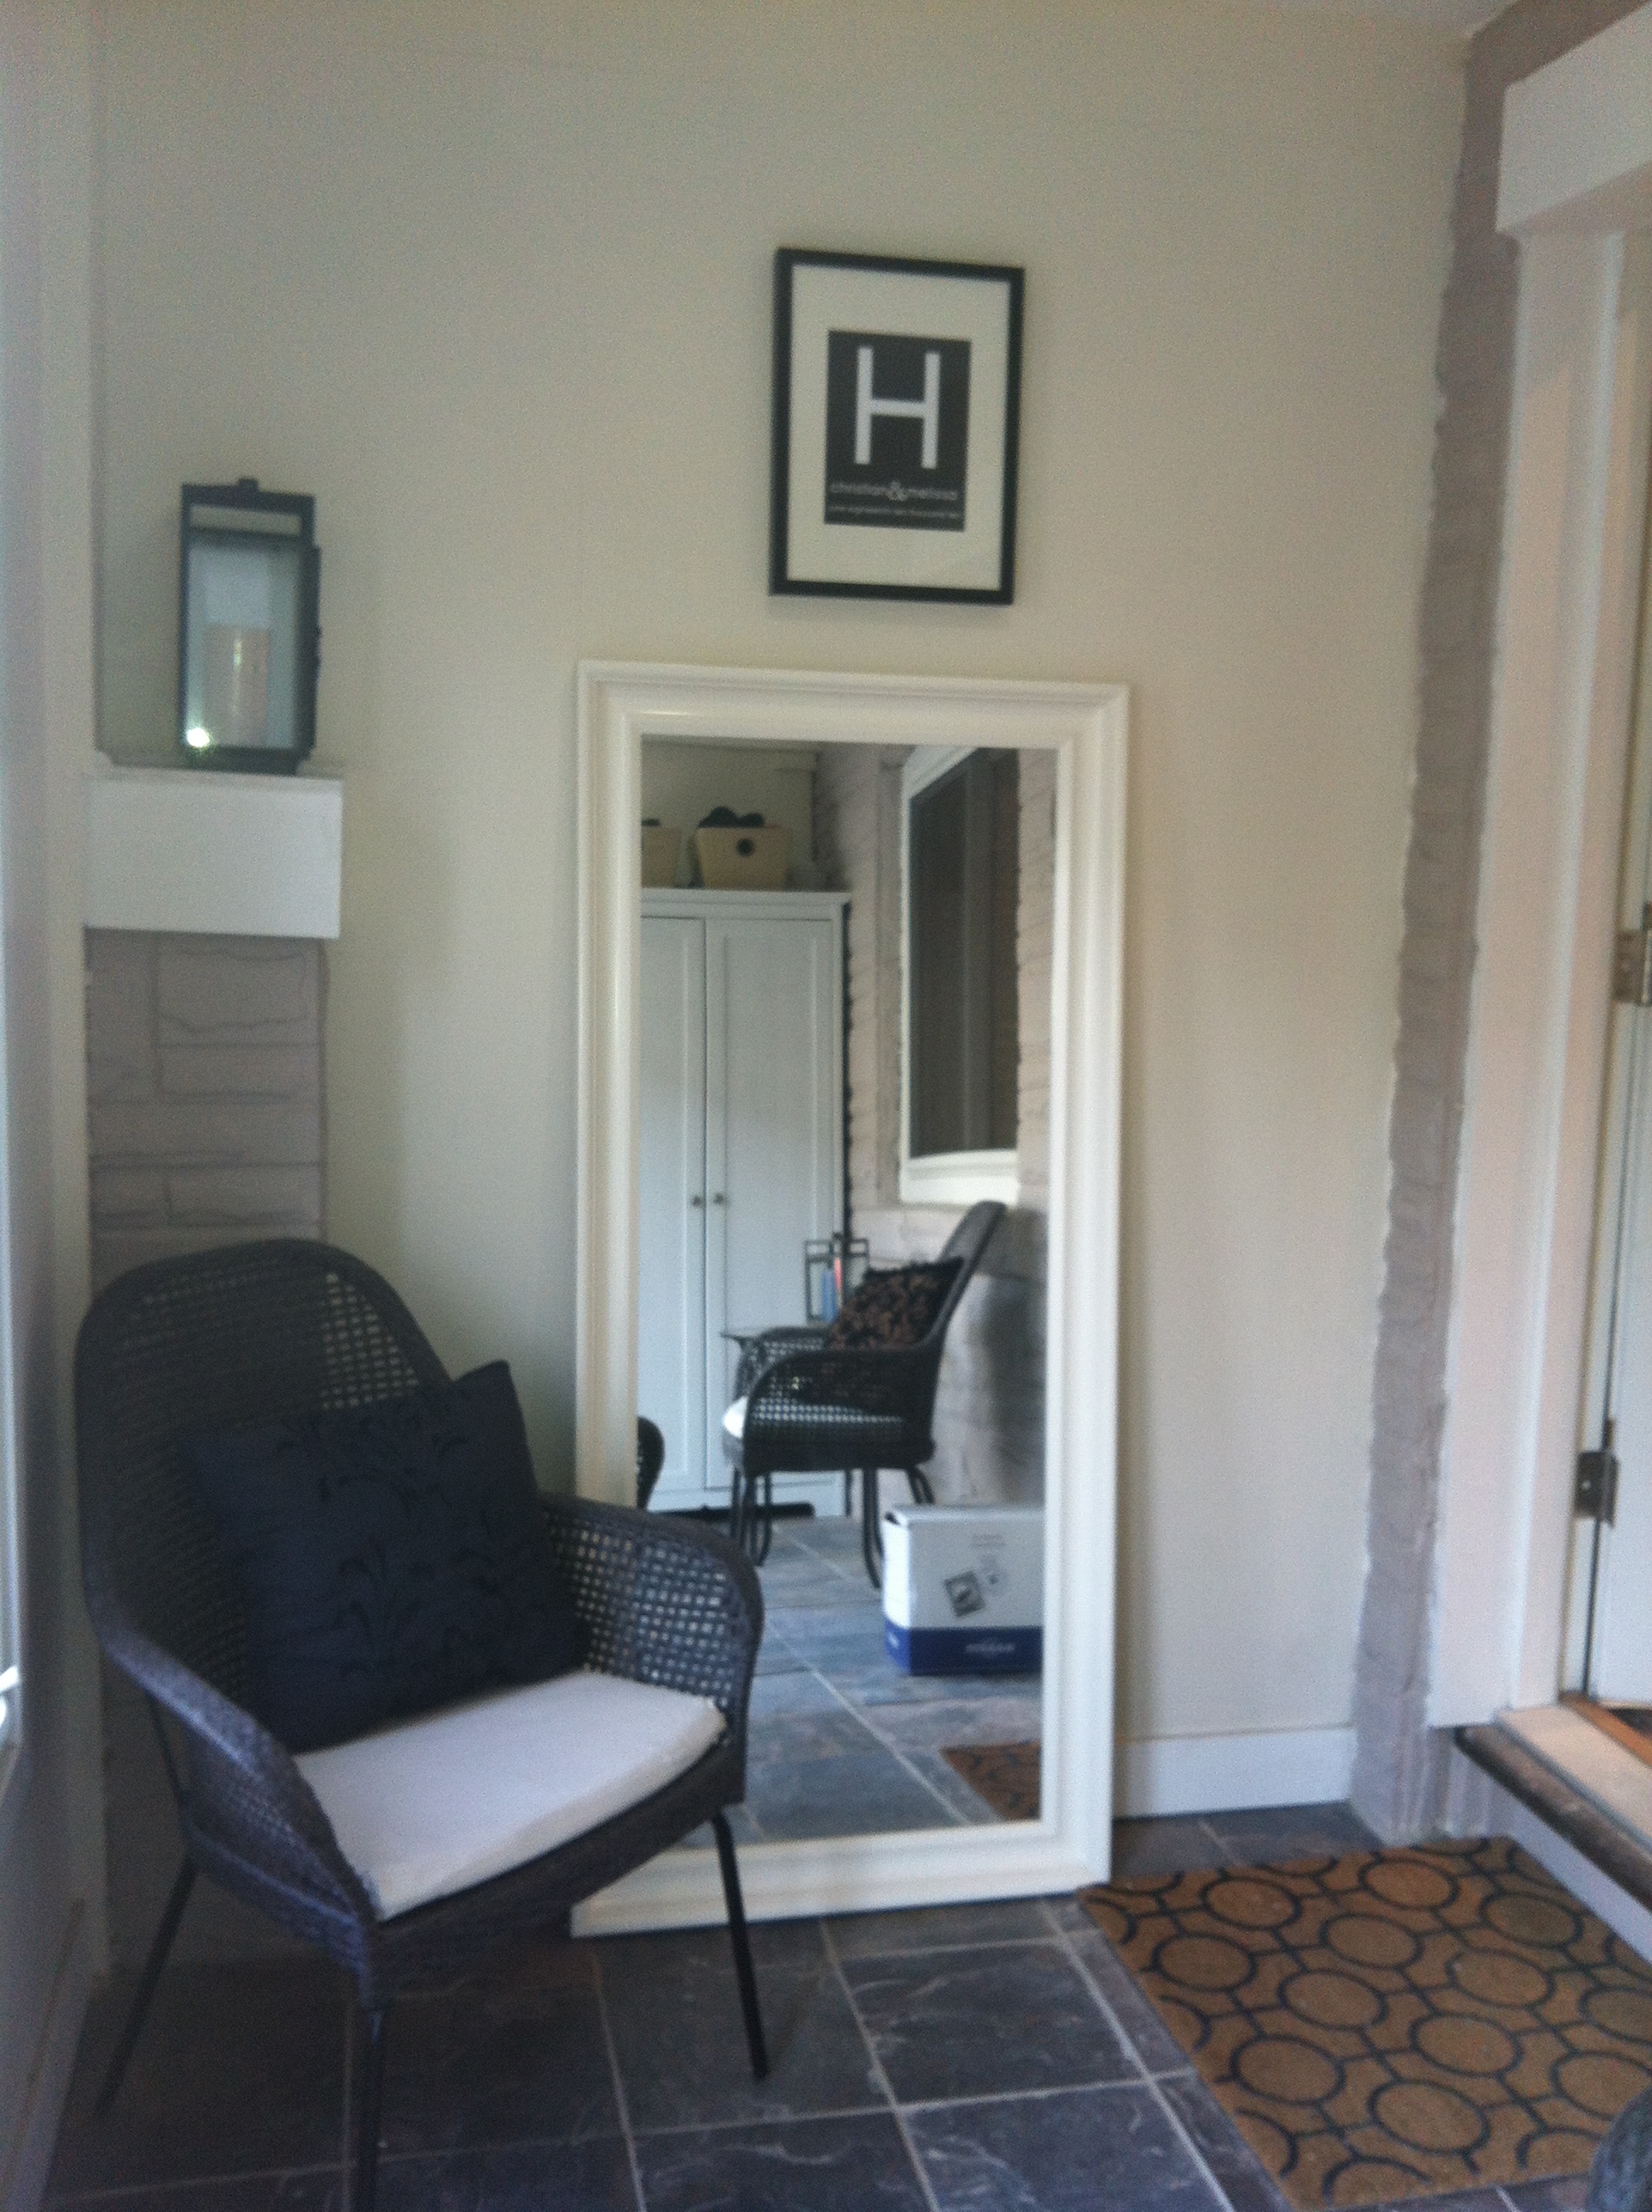
I’ll never forget our first Christmas together at Larchmount Ave.  It was early December, and we were scrambling to finish a few final touches on our first (of many) rounds of renovations.  Not only was it Christian’s birthday celebration, it was also our first Huggett Christmas Party (which is now an annual ‘do, 7 years later), and a big open house to welcome our friends and family to come see what we had been tirelessly been working on for months on end (and why we had been so darned anti-social).  The debutant ball for our home.

It’s 11pm and we are racing to finish in preparation for the party the following day.

“We have to put up the tree”, I said.  “It’s the best part…we can’t have a Christmas party in our new home without a Christmas tree!”

I had lovingly picked out ornaments and determined a colour scheme for our very first Christmas tree.  We put on Mariah Carey’s Christmas album (what else?), made Bailey’s and hot chocolate, and got to it.  At approximately midnight, we were ready to move onto to final part: ornaments!!

I excitedly unwrapped all of our new, sparkling, ornaments from their packaging, only to realize that I had forgotten to buy ornament hangers.  It was a real pine Christmas tree, and the ornaments simply would not stay on the tree without hangers.

My eyes welled with tears and my lip trembled.

It wasn’t about the tree, the ornaments, or even Christmas.  It was about the fact that we had reached that moment of the JOY of decorating together, in our first home, after months of painstaking renovations, only to realize that we couldn’t finish.

Christian looked at my face and knew that we had to complete the tree.

He ran out back to where our growing junk pile of renovation debris was, and came back with an arm-load of old electrical wire that we had removed from the house.  Without missing a beat, he pulled out his wire cutters, pried back the plastic casing, and started fashioning copper-based Christmas ornament hooks from the electrical wire.

Through my tear-filled eyes, I realized what he was doing, and broke into a huge smile. We hung all our ornaments that night with those quirky, mis-matched copper-wire & plastic hand-made ornament hangers.

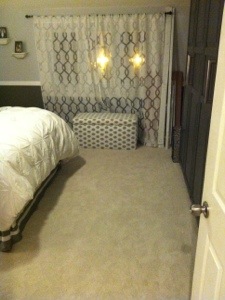
Still to this day, we proudly point out the remaining copper-wire ornament hangers on our Christmas tree and tell that story.  It’s just one reminder of all the experiences we shared together in those years at Larchmount.

The truth is, I could write for hours about that house.

The creak of the floorboards.  The sound of kids playing across street at the school.  Getting ready for our wedding in the living room with my sister, mom and closet friends.  Sitting in the backyard with friends on hot summer nights.  Warding off raccoons.  My sister’s “injury incident” on our back steps.  Welcoming our first basement tenants.  Meeting our amazing neighbours.  Watching Leslieville grow and evolve.  Welcoming friends into our home for parties, dinners, drinks.  Hosting the Larchmount-Caroline laneway sale.  Countless Pho dinners at Hainoi.  Leaking ceilings, shattered glass tables, halloween haunted “porches”, laughing, crying.  So much life.  So much love.

Screen Shot 2016-08-31 at 8.41.01 PM
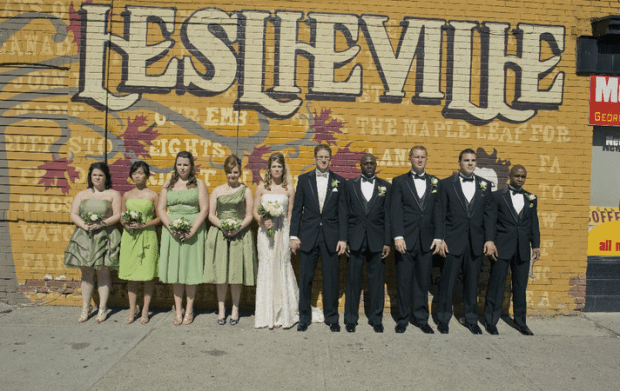
[Photo Credit: Claudia Hung Weddings]

Although we moved out nearly three years ago into our new home, a part of us always remained there.  Our renters took care of it as though it were there own, and in one of those amazing circumstances in life where things just simply fall into place, they are now the official new owners of our very first home on Larchmount Ave, and we couldn’t be happier.

(Bonus: its actually my colleague, so we get to continue to see the evolution of little Larchmount Ave as they create their own memories and home).

It’s the easiest way for me to say goodbye to a place that meant to much to Christian and I.

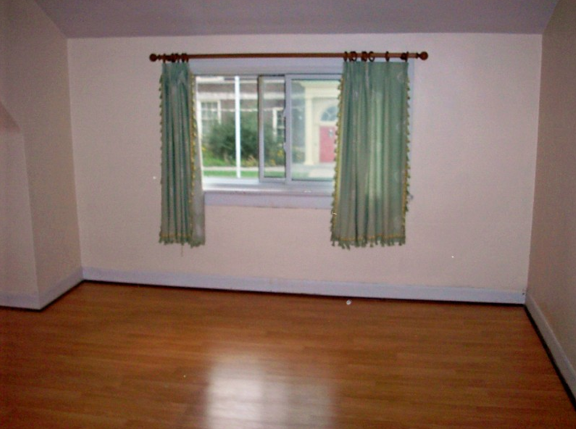
Growing up in a family where moving was essentially a hobby, I was surprised by how much that home meant to me.  I cried the day we moved out, looking back at our empty living room and family room, and thinking back to all those moments we shared together. I could still see the renovation debris all over the floor from the first demo.  I could still see that first quirky Christmas Tree in the corner.  Our first hideous Craigslist couches in the living room.

Screen Shot 2016-08-31 at 8.36.06 PM

So now we look forward to new places, new moments and new memories together…and all with our son, Harrison.  4 years felt like a lifetime in the midst of those renovations, but it’s just a blip in the history of the Happy Healthy Huggetts!

So…cheers to you, Larchmount Ave.  We toast in your honour tonight.  May you continue to provide life, love and happiness to your very lucky new owners.

Screen Shot 2016-08-31 at 8.50.52 PM

Clop, Clop, Neigh: Kentucky Derby 1st Birthday!

Welp, we survived.  One full year of parenthood.  The late nights, early mornings, breast feeding ups and downs, emotional roller coasters, highs and lows, fights, baby cuddles, milestones, bumps, bruises, giggles, cries, teething, ginormous poops, spit ups, fevers, stroller schlepping, tears, yelling, singing, laughing, heart-bursting-right-out-of-your-chest first year of raising a child is behind us.

So, like any parents do, we celebrated baby H’s first birthday in style.  With lots of drinks.

Christian and I are fairly…preppy.  We love a good Tommy Hilfiger sale, freshly pressed collared shirts, gorgeous pair of loafers and old fashioned lawn games.  Yep, we’re those people.  I, in particular, also have a slight obsession with the south.  I actually have a theory that I was meant to be born in Georgia, South Carolina or perhaps Tennessee.  I love all things southern charm: wrap-around porches, big hats and of course…the Kentucky Derby.  (Fact: Attending the Kentucky Derby Race is actually on my life bucket list).  So, we decided to bring the Derby to Toronto!  Self-serving party theme?  Maybe.

First up: a fun and creative welcome sign for our front door.  I wanted to mimic a First Place ribbon from a race; this was super easy to do using:

  • a party “fan” decoration from the dollar store
  • glitter paper
  • white & blue bristol board
  • Hot glue gun
  • mini star hole punch

IMG_2390

Just as I did for my mother-in-laws British Invasion themed 60th birthday party, I love to spread little touches throughout the house during any party, and I squealed out loud when I found these incredible and FREE (free!) Kentucky Derby themed printables on Pinterest from the Hostess with the Mostess.  Simply amazing coordinated ready-to-print cut outs from cupcake toppers to bunting banners.

Check out the framed sign and win-place-show flags below:

IMG_2392

What’s that?  You’re wondering about those Bourbon Balls?  Don’t you worry – I’ll be sharing that recipe shortly.  My sister-in-law even voted them MVP of the party (next to baby H, of course!)

For the living room, which is a bit more formal feeling and also happens to be the room right at the entrance of our house, I opted for something a tad more fancy.

I found the “Run for the Roses” themed printables on-line at Polka Dot Chair …also FREE…also AMAZING.  I loved the classic black-and-red color theme so much that I had to include it too.  The black and red mini paper “fans” were actually left over from my friends little mans’ first birthday, so they were also FREE (do you see a theme here!?)

IMG_2386

One of my favourite little details came from my dear friend Alison, who not only grew up riding and racing horses, but who has actually BEEN to the Derby!  She dug up some old ribbons from Carriage Races her family had placed in and they were such a welcome and authentic addition to the decor around our home:

IMG_2384

In keeping with the theme, it only seemed appropriate to tweak the traditional “pin the tail on the donkey” game.  I bring to you:  Pin the Baby H Jockey on the Horse!  Big shout out to my friend Charlotte for masterfully photo-shopping H’s head onto the jockey.  Such an awesome touch – it’s already been saved in his baby book!

IMG_2389

You can find both the poster and jockey printable (you guessed it…also FREE!) here at Hostess with the Mostess as well)

We tried to stick to southern-style cooking as best as we could, while also offering some healthier options (we are the “Happy Healthy Huggetts” after all!).  My mother-in-law whipped up some delicious finger sandwiches, our friend Merv made his epic Mac’n’Cheese (rumor has it he used FOUR bricks of cheese in that baby), and Christian and I made:

For dessert, we didn’t want to give baby H a complete sugar rush on his first time having something truly sweet, so we opted for these Mini Chocolate Quinoa Cupcakes with Avocado Icing.  (TIP: They are very cocoa heavy, so if I were to do it again, I would pick to either do the cake OR the icing as cocoa-based, not both)

Here is Baby H giving the cupcake a try (he wasn’t so sure about them)

IMG_2399

Oh…and about those Bourbon Balls.  Yeah, there’s NOTHING healthy about them.  But boy were they good.  You can find the recipe here – we doubled the amount of Bourbon, because, why not?

And the birthday boy: he certainly looked the part. I bought this seer-sucker blazer off another mom in one of the on-line buy and sell groups I’m a part of for $8 when baby H was about 6 weeks old.  I hadn’t planned the theme for his party yet, but I KNEW he was going to wear it.  And wear it he did.

IMG_2395

The bow-tie actually makes my heart melt.

IMG_2396

… BOTTOMS UP to a fantastic FIRST BIRTHDAY celebration!!  Happy birthday my love!

IMG_2397

Baby H’s Nursery: Getting Started

Well, this blog has been on a loooong hiatus.  So long in fact, that I’ve gone through an entire pregnancy and now have a 4-month old son since my last post!  Oopsie.   Umm…time flies?

But, there’s no post that has excited me more than this one, so let’s get things rolling again on here!  It’s time to share the story of Baby H’s nursery (in several parts, because there’s far too many details to share in just one post!)

It took zero time to come up with the theme for this room.  Yes, I decided on the nursery theme of our future child long before he came along…err…dare I say, long before he was conceived!?  Seriously, I think I’ve had this theme picked out for about two years.  Those of you who know me know I have a love for major obsession with all things nautical.  Perhaps it is a sub-conscious nod to my west coast upbringing?  For whatever reason, it had to be addressed, and what better room to address it in that a sweet baby nursery.

Nautical can be done in so many ways.  You’ve got your “Nantucket Nautical” with navy blue, red and white and lots of lighthouses and lobsters; you’ve got “Beachy Nautical” which is very soft and neutral, and I came up with “West Coast Nautical” as the type for this room.  Think Nantucket-meets-Beachy-Nautical 🙂

Enter my Pinterest Board, which slowly evolved into the style that we landed on many months ago.   This lovely collage is the one that caught my eye as the overall “look” we were going for:

Baby H nursery inspirationOne of the first things I bought was this amazing stencil from Cutting Edge Stencil, appropriately named “Perfect Catch”.  It seemed like a good idea at the time, stenciling the entire room.  But then my brilliant husband came up with the idea of add some wainscoting into the room as well.  He’s been wanting to try his hand at DIY wainscoting and this provided the perfect opportunity.  Yes, I love that he gets excited about this stuff too.

After we cleared out the stuff from our “home office” (which we quickly realized we never used…no harm done making room for baby!), the first step was to measure out the wainscoting.  Christian used basic, pre-painted MDF trim from Home Depot.  Starting in the centre of each wall, he measured out to determine the distance between each piece of trim.

Taking time with measuring is KEY.  It’s all about the prep work.  Christian also used a level and a chalk-line to ensure that everything was straight as an arrow.

2015-01-11 16.38.44

After filling in all the nail gun holes, it was time to paint the lower half of the room in good ol’ Benjamin Moore CC-40 aka “Cloud White”, which is the colour of all the trim in our house.

What’s clever about this method is that it gives the illusion of actual wainscoting but costs waaaaay less as you’re not actually covering the entire bottom on the wall in wood panels.  (If you’re really interested in some home decor nerdery, here is the wikipedia definition.  FACT: I knew what wainscoting was by the time I was 10 years old…missed my calling?  Perhaps).

2015-01-17 19.21.29

For the top half of the room, we chose a neutral blue-grey: CIL Paddlewheel Grey.  We agonized over this colour because of the next, and very tedious step (no, no, wainscoting was not enough for baby H…we also stenciled the upper wall!  And by “we”, I mean Christian).

Now, let me warn you: stenciling is NOT for the weak, procrastinators, or the impatient.  In fact, it’s not for perfectionists either, which is an adjective that could be used to describe Christian.  He.  Spent. Hours.  And I mean HOURS, stenciling this room.  I think it took him two full 8 hour days to just get the stencil done.  He vowed we were NEVER using a stencil again and I would have to agree, but I might try to convince him again (don’t tell him I told you that!)

But oh, the finished product…worth it!?  We think so.  I mean, I endured 10 months of being prego, PLUS labour, so I’d say we’re even now after the stencil incident.

Check out this beauty progress shot:

2015-01-18 11.23.25

And no, we didn’t just opt for a feature wall.  Christian stenciled the ENTIRE room.  Initially we were worried it would be too busy (hence the concern over finding just the right base colour), but we were over the moon with the final result.  I kid you not, everyone comes over and thinks its wallpaper, and Christian can’t help but beam with pride (how to compliment a perfectionist 101).

….looking for the final reveal photo?  Sorry, you’ll have to wait until a few more posts!  So much story to tell about this little room before I share the final result!

Come back and visit soon.

M

Summer Porch Refresh

I’m one of those nut-cases who likes to swap and update decor as the seasons change.  The air changes, the temperature rises or falls, the colours adjust and I just get inspired.  Ever since we renovated our front porch two years ago, I have been adjusting the decor every so often….but I quickly realized that a) I have a pillow problem, b) it can get pricy, and c) storage of seasonal decor items creates an issue.

And then I realized that it was time to take a sewing class.

My solution is to simply re-cover my toss cushions and make smaller swaps to things like candles and art.  Yes, ladies and gentlemen, this is my idea of a fun Saturday night.  No joke.

Here’s where I started.  Cute, but blah.  I was so ready for some summer lovin.

2013-04-06 17.50.57

Swapping our view towards the interior door and things aren’t much better.  Another print from my gal Angie at Romantica Home on Etsy, and that’s about it.

2013-04-06 17.51.14

PS- see the wine box sitting under the chair in the mirror reflection within the photo above?  Well, guess what’s in the box….!?  Okay I will make it multiple choice for you:

a) all volumes of my Style at Home magazine collection, dating back to 2008

b) wine (what a concept)

c) Justin Timberlake singing this song

d) the shards of every single piece of safety glass that we picked up off of our living room floor following  the fatal glass coffee table incident

Did you guess?  It’s D!  Isn’t that hilarious?  Actually, it’s not funny at all, but what else can you do but laugh at this point?

Anyhoosin…moving right along.  So, I needed to inject some summer life into the porch.  Enter: punch of yellow!  First, it was time to make some art.  IKEA Ribba frame + glue gun + fabric + left over letters from our wedding cake topper = ART

2013-04-06 20.09.56 2013-04-06 20.10.13

Then, in true meant to be fashion, I found this adorbs print at Target for $25 to hang above our double doors:

2013-04-06 20.11.10

And, out came the sewing machine to re-cover my dull winter pillows with this precious bird print.  Because, who doesn’t want to put a bird on it!?

2013-04-06 22.45.54And speaking of birds, I didn’t stop there.  Look at these little guys on my standing mirror: “Tweet, Tweet!”

2013-07-30 19.14.11

Add a few other sun-burst touches like this little planter (for $3.99 @ Michael’s)…..

2013-07-30 19.14.45And this beautiful throw from Indigo (a steal on-line for $14.99!)

2013-07-30 19.13.44….and this porch is summer-ready!  Time to mix up some mojitos and start enjoying the sunshine 🙂

Beyond our 4 walls: Tracy’s Guestroom Redesign

I love my job, and my company.  I enjoy going to work every day and work with amazing colleagues.  Honestly.  But, if I had to give it up and pick something completely different to fill my days, I’m pretty certain it would be some combination of decorating/ staging/ making-over people’s spaces.  It just brings me such joy.

A few months back, my dear friend Tracy asked for my help with her guest room.  She had this sort of pained expression on her face when she said “I have this guest room, that you can hardly call a guestroom…it’s so un-inviting!  Would you be willing to help me fix it up?”.

I first laughed, because she was acting like this would feel like work for me.  Hardly.  I had a field day.  As Tracy’s wedding was approaching, I set up a gift registry that ended up bringing together most of the items needed for a welcoming guest room.  A few weekends ago, Christian and I headed to Peterborough (or P-town as the cool kids are saying these days) and completed the transformation.  It’s almost like we could hear angels singing from the rafters of Tracy’s 10-foot ceilings.

First, a before picture…because who doesn’t love a good before and after!?  Here we have the view from when you walk into the room.  Gorgeous old wood floors, lovely blue-grey walls and a big, bright window.  It’s a dream….except for the fact that it’s just…err…a bed.  And a mis-matched antique floor lamp with an IKEA Lack side table:

2013-02-02 16.26.27Well, this bride-to-be had plenty of other things to do, such as plan her May wedding…enter Melissa!

The best thing about working with Tracy was that she is incredibly easy-going.  Actually, she is probably one of the most easy-going people I know.  Her only stipulation was that we weren’t going to paint.  Well, perfect, because I’ve painted enough walls at my own house, thank you very much.

Fast forward a few months, insert a wedding shower, wedding, and the invasion of Christian and Melissa, and this is now the vision that welcomes guests as they walk into the guest room:

2013-07-21 18.39.29For the win!  There are still a few finishing touches remaining, but you get the idea (for example, you will notice we have only one side lamp, and I’m working on a few additions, such as a repurposed old bench for the foot of the bed).  The headboard was something that Christian and I built as our wedding shower gift for Tracy and her hubby to be, and we actually ended up reusing the duvet, which was a total bonus.  Those light, airy curtains were a total at $10 per panel and I just love how they frame those gorgeous, giant windows and blow in the breeze.  Ahhhhh.

My favourite “I love my husband” moment was when he suggested swapping out the light fixture.  You can’t see it in the original photo, but these glorious 10 ft ceilings were adorned with….a basic builders light fixture.  Womp womp.

Tracy and I are both all about finding great deals, so I promised her that the only way we would replace the light, would be with something under $50.  Victory was mine at Home Depot when I scored this adorable antique-looking chandelier for…. $18!  Yes!!  It was already marked down on clearance to $35 and then marked down again to $18.  Amazing.  I was like a kid at Christmas, babbling away to the check-out lady at Home Depot about what an amazing deal it was.  I do that.  A lot.

Now, let’s take a closer look at the lovely blue, grey, white and yellow combo on the bed:
2013-07-21 18.40.29Purrrrrrrrdy.

In my opinion, a great guest room should always include the following:

  • Extra pillows (you never know if your guests like firm, flat, or somewhere in between.  Having extras lets them decide)
  • The feeling of checking into a charming B&B (because, really, who doesn’t want that?)
  • At least one bedside lamp and one nightstand (no one wants to fumble for their phone in the night in a foreign room)
  • Access to a wall outlet (speaking of phones, we all need to charge our phone – make it easy for guests)
  • Water glass/ pitcher beside the bed (see point above re: fumbling through the night in a foreign room)
  • Handy guest towels (I like to put these in a basket on top of the dresser; don’t make your guests ask – always anticipate!)

Here’s a close up of the charming Eclipse bedside lamp from Urban Barn – I love the touch of glam in a somewhat “country chic” bedroom.  The night stands are IKEA Hemnes in white.

2013-07-21 18.40.35I’ll be back in the coming weeks with a few more updates here….I joked with Tracy that I will likely keep going for the next year until I have it just “so”.

So there you have it….another happy customer.  Okay, well she wasn’t a customer, but that’s fun to say 🙂

One day…..

Dream Bathroom: Revealed!

It feels like we’ve been sidetracked with all of this flooring drama.  Actually, no, not “feels like”…we really have! We’ve had the bathroom about 85% done for several weeks, but all this flooring nonsense stopped us in our tracks.

This past weekend, we managed to get a lot accomplished. There’s nothing like the impending arrival of my parents from Vancouver to cross things off the to-do list. Oh yes, we have been busy bees. We can proudly say that our bathroom is now 95% done. A few finishing touches, along with the much-anticipated arrival of our bathroom art (really? 2 weeks at customs? For art posters!!??), and we’ll be able to bump that number up to 100% finito.

But I can’t wait. Must. Share. Progress. Photos.

First of all, remember this picture?

20130208-085024.jpg

This has got to be one of my favourite renovation-related photos of all time. Anyhoo, back in this post of yore, I shared all the challenges that we had with our tiny, oh-so-narrow bathroom: we couldn’t physically be in there at the same time, the sink literally overlapped with the toilet, the shower head hit Christian in the chest (I think I forgot to mention that one), etc etc. It really boiled down to a non-functional layout for us.

So we changed it. A lot.

Before – view as you walked into the bathroom (sorry it’s so stretched…my SnapFish album went a little crazy):

Screen Shot 2013-04-16 at 9.56.11 PMThis photo does not do the narrowness justice: the entrance was just 24″….Christian and I had to do the Tango every time we passed by each other in here. So, onto the money shot:

20130416-215943.jpg
Yes, our bathroom is now a VERY happy place.

Let’s zoom in on a few fabulous things!  First, the toilet.  Yep, I’m leading with the crapper.  Honestly, I never thought I’d be someone who got excited about a toilet but this thing is seriously gorgeous.  And comfortable!  I was kind of against the square at first but I’m so glad that Christian got me on-side.  It’s a conversation piece.  Yep, my toilet is a real conversation starter….what can I say?

20130416-220059.jpg

The floor tile is from the store that never ceases to make me chuckle at the simplicity of the store name,  The Tile Store.   Soapbox moment warning!  If there is one thing you take away from this post, let it be this: do not go to big box stores for your tiles without shopping around.  The tile options that are available in this world will blow your mind!  We have been so surprised at all the options that are out there, many at very reasonable prices.  Yes, you can get lovely tiles at Big Box stores, but if you have a specific “vision”, shop around. Go to the mom & pop shops that only sell tile…you’ll be glad you did.  Don’t compromise your vision just because Home Depot doesn’t sell it.

Moving on…..we opted for a teak-look vanity.  Originally, I was really feeling the ash-grey look vanity (which this very same one comes in, by the way) but again, points for Christian for convincing me of the “warmth” of teak (I love that my husband actually cares about these decisions):

20130416-220126.jpg

We picked up both the toilet and the vanity at Toronto Vanity, where Miguel was super helpful and responsive.  If you’re into a bit more of a contemporary/ modern look, this is the place to be.  Most vanities come with the sink top, faucet (see photo below for a close up of the faucet), AND medicine cabinet for around $1,000.  Even IKEA vanities have a hard time beating that price…trust us…we did our research.  What’s great is that there are about 8 different faucets you can choose from, all for the same all-in price.  Customization without all the “I love this faucet more but it’s twice the price” drama.  Cuz  you know I’m always the one who wants the more expensive one.  Always.

Now for a zoom-in on the backsplash, which matches the tile in the shower surround.  It’s a beautiful ice-blue frosted square glass tile. Again, we shopped around and had a hard time finding anything like this for under $8.00/ sq foot….on a whim, we hit up Ceramic Tile World in the east end of Toronto, and there she was…on sale for $5.00/ sq foot.  It was destiny!  And I’m in love with my marble soap pump with a hint of sparkle that I picked up at the Bay…it’s so glam-squad.

20130416-220140.jpg

Finally, the shower head.  Christian loves the square look so I let him run with this one.  We went to Bath City in the Beach and they were amazing.  Honestly, if you want to learn everything you ever wanted to know about plumbing on a Saturday afternoon, go here.  Their hours are awesome and the staff are super knowledgeable. We picked up the shower system and glass shower door from them.  A+

20130416-220150.jpg

The best part is?  The shower head doesn’t even come close to hitting Christian in the chest…or head!  It’s so tall!  Yay!  It’s a beautiful chrome finish rainfall shower and again, I’m in love.  And yes, I *might* sometimes sing into the wand that you see in the photo, as it totally resembles some kind of futuristic microphone.  Whatever.

What’s cool is that we really stuck to our “vision” board and things really came together!  What the heck did people do before Pinterest?

Bathroom inspiration

So, there you have it!  Our 95% complete bathroom!  More to come on artwork, towel bars and other riveting finishing touches.  But we’ll save that for later…too much excitement already for just one post!

xo M

The Carpets are IN!

Yes, shout it from the rooftops and sound the gong: we have carpets! It was a looooooong wait, but last week, the carpets went in, and they are beautiful.

We decided on the Martha Stewart carpet collection at Home Depot, in “Gull”, which is a grey-ish off white. Very neutral….and so CLEAN. My heart does a little flip flop everytime I get upstairs. Let’s bask in the glory of before and after photos, shall we?

Main hallway facing the bedroom BEFORE:

20130410-085941.jpg

And the same view AFTER:

20130416-210802.jpg

Here’s a view of our master bedroom, just after Christian put down the plywood (following the extremely drawn-out flooring saga) in preparation of the carpet:

20130416-211039.jpg

And a “progess” photo, just after the underlay went down:

20130416-211136.jpg

But before we get to the final reveal, let’s take a trip back in time to 2009, from photos that we took on our very first day of official home ownership.  Wowee:

Screen Shot 2013-04-16 at 9.35.47 PMYeah, we’ve come a long way, baby…..

20130416-212408.jpg

It’s beautiful. And our house totally smells like new car! Now it’s time to slowly put things back together….

The Flooring Saga

On Thursday, the carpet was supposed to go in upstairs. This would have marked a huge step towards the finish line in our upstairs renovation. Notice I said “supposed to”….

Let’s rewind for a minute: two Saturday’s ago we put out the plea to our wonderful friends: Give us a few hours of your time, we will provide pizza and beer, and our floor will go bye-bye. Two bedrooms with laminate flooring + bedroom/ hallway with wood parquet….four hours of work, max. Progress was happening:

20130401-214626.jpg

As the floor rip-up party continued, we kept running into sections of excessive glue and nails….someone never wanted this flooring to be removed! Then we got to the master bedroom. As Christian and his brother began pulling up the laminate, they realized that for some ridiculous make-us-want-to-egg-their-house reason, the previous home owners of our place decided to GLUE down the wood laminate flooring in our bedroom.

Yep, glue.

For those of you who haven’t worked with wood laminate, it is designed to “float” over the subfloor or old flooring. Nowhere is there ever any mention of glue.

Less than half of it came up, leaving us with this mess:

20130401-215635.jpg

Some google searching provided several ideas on how to pull it up: we bought a heat gun and slowly melted the glue inch by inch so we could scrape it up (the most painfully frustrating method), we rented a pneumatic
chisel from Home Depot (which is the LOUDEST thing I have ever heard) to try to chisel it up, poured hot water on it (didn’t help), shoveled it (too hard on the back), yelled at it….and then I cried. 40 square feet of laminate flooring was not budging.

We were told the carpet installation company would “assess” the floor and offer suggestions on how to remove it. Didn’t happen. The carpet installers took one look at that stubborn floor and left. We were totally defeated, and stuck with our chaotic mess for at least another week.

On Good Friday, Christian decided to give the floor one last shot. He got his circular saw, set it to a shallow setting, and literally cut out the floor.

20130401-220751.jpg

It worked. My amazingly patient and persevering husband tried everything, even after I had given up and admitted defeat, and he found a solution.

A few sheets of plywood to level the floor with the rest of the room, an we were set for carpet installation….and a relaxing Easter weekend!

IKEA date night

Date night has been a little lacking these past weeks as Saturday nights are spent passed out on the couch after a full day of work, and weeknights are spent (trying to) catch up on household chores that didn’t get accomplished on the weekend!

We originally were going to do the “wait at the doors when the store opens” trip to IKEA first thing in the morning, but I convinced Christian that we could turn our little shopping spree into somewhat of a date night.

Our mission? Get the materials for our first IKEA hack! Haven’t been to the IKEA Hackers website?? You are missing out on a lifetime of furniture recreation opportunities! Go there….NOW….I will wait…..

Ok, so back to “date night”: our mission was to purchase PAX wardrobe sliding closet doors for our newly built upstairs hall closest, as well as interior shelving to help create storage inside. After conducting a lot of research, we quickly learned that other sliding doors are either a) way overpriced, or b) just plain ugly. IKEA Pax are inexpensive and come with a 10 year warranty! We’ve had the full wardrobe system in our bedroom and its been going strong for 3+ years.

But back to date night. Our first stop was food, including this odd sparkling pear drink that was rather delicious:

20130325-082537.jpg

Horse, or no horse, we were getting meatballs:

20130325-082637.jpg

After a romantic dining experience in the IKEA cafeteria (for future date night reference, they are licensed!) it was off to pick up our goodies. Our original plan for interior shelving was to use Expedit, but we quickly realized that adjustable shelving was way better, so we instead picked up the deep Billy Bookcase. For the exterior doors, the glossy white ones we wanted we on sale (score! Like these ones but in white). A few $1 ice creams later, we were ready to rock and roll

20130325-082855.jpg

The best part of the night was actually fitting everything in our car. Saving on the doors + saving $50 in delivery = successful trip to IKEA!

20130325-083140.jpg

Mark my words: never buying a car without a hatchback again!

Happy shopping 🙂

Okay, now there’s REALLY nowhere but up from here…

We thought we had hit rock bottom in the renovation. That night where everything was going wrong, and then our coffee table broke? Yeah, we were pretty sure we were movin’ up and movin’ on. Nope.

The tub is in (yay!) but not draining properly. Christian first assumed that he’d made an error in connecting the bathtub to the drain. We had a plumber help with the rough in and then Christian did the rest. So, off to Home Depot for another drain kit and another $25 down the drain (no pun intended. Okay, maybe it was). After hours of work and more failed attempts, it was clear that this wasn’t the core problem. A few inches of water would take an hour to drain. Not exactly our dream bathtub.

So, we called another plumber and he was at our place within an hour. He quickly found the culprit: someone had done a handy-man special to our drain in the past. And by handy-man special, I mean literally plugging the larger pipe with some sort of goop in order to affix the smaller pipe arm to it. Check it out:

20130308-082042.jpg

A plumbing professional I am not, but I can tell you pretty quickly what is wrong with this picture….doesn’t it look like chewing gum was used to seal this?  We learned that this was linked back even to our old shower not draining properly.  We’re starting to se an unfortunate theme based on the five-elbows-to-make-a-pipe situation that we uncovered a few weeks back.

So, out it came. We are so happy to report that the new tub is draining perfectly, however, our powder room and only other bathroom in the house (well, toilet and sink at least) looks like this:

20130308-082319.jpg

20130308-082344.jpg

We have now added to our list the need to re-drywall the back wall of the powder room. Currently, we have no light or mirror in there….so I’m doing hair an make-up at work this week. Or not at all. I’m kind of over it.

And our spirits? Shall we NOW tentatively say: “there’s no where but up from here?”. Better not jinx it.